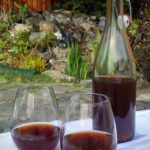

Homemade plum wine is earthy, rich, smooth, and delicious. This easy recipe is perfect for first-time winemakers.
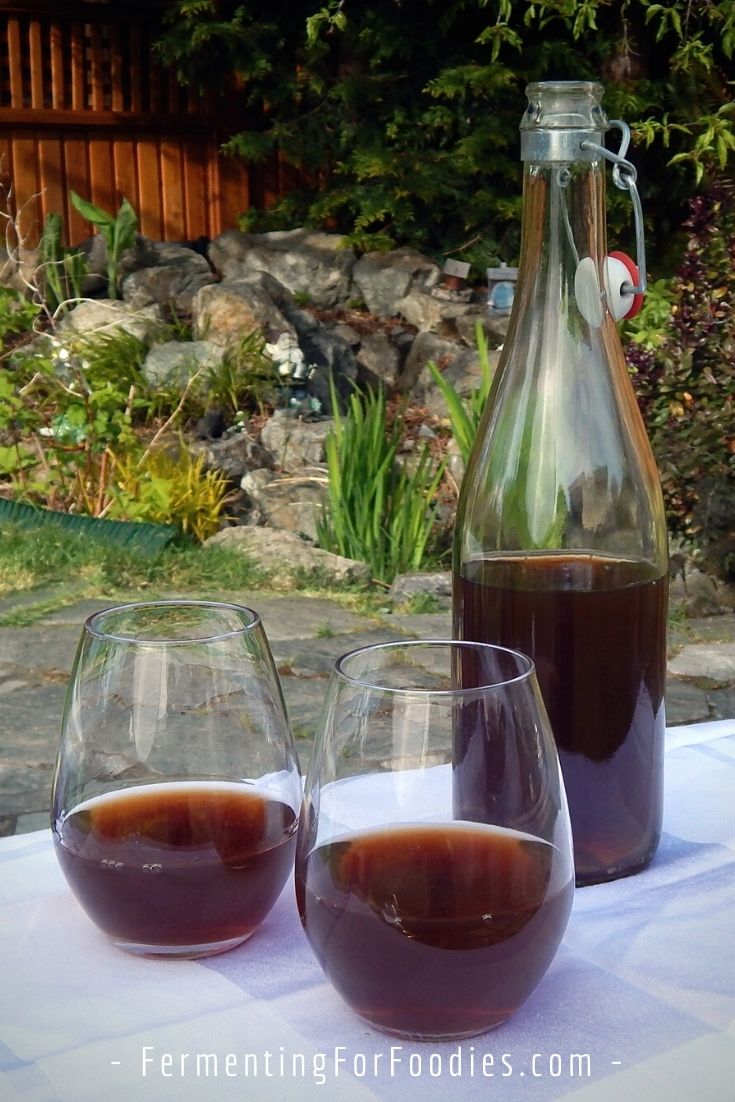
Do you have a huge crop of ripe, juicy plums that need to be picked? Why not try making plum wine?! Homemade plum wine is not at all like the sweet, fruit-based wines that you buy in the liquor store. This wine is an earthy and full-bodied drink that is rich and smooth. A perfect after-dinner wine.
A Perfect Wine For Beginners
Homemade plum wine is relatively easy. It ferments well and always ends up tasting delicious. It’s the first wine I ever tried to make, and I have been making it for years.
It’s hard to include all the little details in the recipe card. So here are a few extra notes. I’ve tried to cover everything, but if you have a specific question feel free to leave a comment.
Varieties of plums
I use green gage plums, which grow wild in a park near my house. They are so juicy that they don’t last longer than a day or two after ripening. Perfect for wine!
Most ripe plums are soft and juicy enough to mash for a whole-fruit wine. This recipe is quite popular, and people have been using it to make wine from all different varieties of plums. And using a mix of different types of plums will result in a full-flavored wine.
The Importance of Sanitation
The fermentation of alcohol can involve a small amount of methanol production. This is especially true for ferments with pectin in them (like plums).
However, the amount of methanol produced from wines (commercial or homemade) is very low. The danger comes from distilling wine into brandy, which concentrates the amount of methanol.
Regardless, the best way to prevent any methanol production is to make sure that your ferment is not contaminated with pectin-loving bacteria, yeasts, and fungi, which will break down the pectin into methanol. The secret is to sanitize everything. Check out this post on sanitation for winemaking.
Tips for Beginners
If this is your first time making wine, then I recommend reading some of my general posts on winemaking before you start. They will explain all the steps involved in the recipe.
- How To Make Cider and Wine provides detailed information about the required equipment and all the steps in this recipe.
- How to Use a Hydrometer explains how to measure the alcohol content of your wine.
Check out this video of all the steps involved with making plum wine.
Homemade Plum Wine
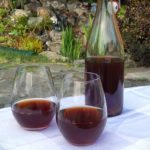
Plum wine is earthy, rich, and smooth. It is delicious as an after-dinner wine or served chilled as an aperitif. It’s also a great base for mulled wine.
- Prep Time: 30 minutes
- Total Time: 30 minutes
- Yield: 3–4 bottles 1x
- Category: Alcohol
- Method: Fermentation
- Diet: Vegetarian
Ingredients
- 5 lbs of ripe plums (no moldy ones)
- 3 lbs of sugar
- 16 cups of filtered water (chlorine-free)
- 1 teaspoon of fresh lemon juice (not bottled)
- 1 packet champagne yeast

Instructions
- Throughout the wine-making process, it is important to sanitize EVERYTHING that comes into contact with the plums. This is the best way to ensure the wine tastes good and ages well. Here’s a post on sanitation if you need more details.
- Wash the plums, remove the stems, and put them in a large pot. There’s no need to remove the pits, as they’ll be left behind when you filter out the solids. Use a potato masher to roughly break the skins.
- Bring the water to a boil. Then pour the boiling water over the plums. You can do this in batches with an electric kettle. The boiling water is to help kill off any mold or bacteria that might be on the skin of the plums. Put a lid on the pot and stash it in a quiet corner of your house to cool.
- After 24 hours, add the lemon juice and sugar to the plums and give them a good stir. Follow the instructions on the yeast package (mine involves rehydrating before use), then stir the yeast into the plums. Give everything another good stir after one hour to make sure it is well mixed. If you want to calculate the alcohol levels, remove some of the liquid at this point to measure the specific gravity.
- Cover the pot and leave it somewhere warm to ferment for 4-6 days. Give the mixture a good stir with a sanitized spoon once or twice a day.
- After the initial ferment, filter out the solids and move the liquid to your carboys. It’s better to leave some of the liquid behind in the solids than to have solids in your carboys. I usually use a siphon to get out most of the liquid. Then I strain the rest through a mesh brewing bag and bottle it right away for a bit of plum cider*. It carbonates very quickly, so stash it in the fridge right away and use a bottle that can handle the buildup of carbonation. It should be carbonated and ready to drink after 2-3 days in the fridge.
- Top the carboys with an airlock and leave them to ferment somewhere dark for 2 weeks. The back of a closet or the basement are good options.
- After 2 weeks, rack the wine into a clean jug for another round of fermentation. (This is to remove the spent yeast, which doesn’t taste good. Skipping this step will result in a not-so-tasty wine.)
- After two months bottle the wine. The wine needs to age for at least 10 months to develop a nice mellow flavor. I’m often tempted to sample it early, but it’s always a disappointment.
Notes
- *I realize that cider is technically made out of apples. But bottling the young plum wine results in a lower alcohol, sparkling beverage that is pretty much cider.
- This plum wine recipe does not use sulfur dioxide to curb fermentation. So it is not a sweet wine and the alcohol levels range between 12-15% (depending on the sugar level of your plums). It tastes a bit more like brandy than wine though, unlike brandy, it is not distilled.
- If you are using coarse or unrefined sugar, you may want to dissolve it in boiling water before adding it to the plums. Just reserve 5 cups of water from the initial batch to help dissolve the sugar. If you are using regular, refined sugar, it won’t have any problem dissolving.
Making plum wine is one of my treats of the summer. I get the kids rounded up and head over to the orchard to harvest; they get to hang out and gorge on the fruit while I fill up a tub of the sweet fruit. We sort through it at home like it was Halloween candy and get a batch simmering with some sugar to boost the alcohol levels. We find that the wine doesn’t get to it’s best until April or May, so we get a solid 8-10 months of expectation. But it never disappoints!
Wow! You are so lucky to have an orchard (or access to someone else’s orchard). Sounds fun!
When do you remove the pits from the plums?
We don’t remove the pits. We just leave them in the mash, then they get filtered out when we move the liquid to the carboys. It’s easier that way. 🙂
Trying this for first time.
the initial fermentation Cover the pot and leave it somewhere warm to ferment for 4-6 days, how do you tell if you should leave 4,5,or 6 days?
Thanks
Sam
The exact number of days doesn’t matter. We usually look at the calendar to figure out which timing works best for us! If it doesn’t matter to you, then maybe go for 4 days, as there is a risk of contamination when fermenting in a large pot… however, I’ve personally never had an issue with contamination. The yeast is so vigorous that it easily outcompetes any wild yeasts.
Good advice. Increading the fruit tends to yield a better wine imho. My best was a strawberry wine with lods of fruit…lovely!
I’m reading so much about campden tablets. I didn’t find it anywhere in the recipe. Do you use them or anything like them in the process or at bottling?
Campden (sulfite) tablets can be used for sterilization (early in the wine making) or to curb fermentation at the end. I don’t use it in any of my recipes, mostly because sulfites bother me, but also because I don’t mind letting the yeasts die out naturally.
My plum wine (using green gage plums) usually stops fermenting at around 13%. However, it may be different depending on the type of plums you use.
My wife and I are trying this plum wine recipe with the plums we picked off our plum trees this fall. We are currently at the carboy stage and are anxious to try it out in 10 months! So far, so good!
Patience is key. I always try my wine early and it’s just not as good.
After 2 weeks when you rack the wine into a clean jug what kind of jug do you use? I am starting small with limited resources. Can I Remove my wine from my initial carboy, clean the carboy and then add the wine back into the same carboy? Thank you!
I usually use the 2-gallon juice jugs and rack to a fresh one. I don’t always have enough to rack to a fresh one, but I always have a spare one. Then if I’m racking 3 jugs, I can move one jug to the spare one, then quickly clean the empty jug (to remove the yeast and settled solids), and rack into the freshly cleaned jug.
If you only have one carboy, then you can rack to a pot then back to the carboy (after cleaning). Two bits of advice: make sure the pot (and everything the wine will touch) has been sanitized. 2. Try to avoid splashing. Racking always results in a bit of aeration, so racking twice is worse because of that. Slow steady. If you have an auto-siphon, then let it slowly do its thing. Good luck!
What size bottles does this recipe ask for? It says from 9-12 just curious on then oz as I have made 65 lbs of plums from our tree. Need to buy them before I need to bottle it 🙂
Wow! That is a lot of plums! You will need about 16 cups worth of bottles (per batch). Though the plums add liquid, you also will leave some liquid behind in the racking. So either 6 flip-top wine bottles (750 mL), 4 flip-top beer bottles (1L) or 2 plastic pop bottles (2L).
Thank you so much !!! Super excited as it’s our first time trying this
I assume you’re aging the bottles for 10 months at room temp away from light. Is that correct or do you age in refrigeration?
Hi Melissa, the wine needs to age at room temperature away from light. It doesn’t need to be refridgerated. Enjoy!
The fruit pulp in the wine rose up and it started smelling. Is this a good or a bad sign?
This is before you racked it to a carboy? The pulp does rise up which is why you stir it every day. You should remove the solids when you rack it to a carboy. The smell isn’t an issue if it smells like a good, yeasty ferment. If it smells bad (rotten) then that is a concern. Hope you have a good, yeasty smell! Cheers, Emillie
Trying for first time and juice not fermenting at all in carboys after filtering out solids. I used very ripe red plums. Should I forgo the third fermentation and bottle? Restart fermentation?
Hum… I’m not exactly sure where you’re at in the process. However, the first two weeks in the carboy, the wine should bubble. It won’t be as quick as beer, but you should definitely see some action. After racking to a clean jug, it won’t bubble as much. That’s because the fermentation slows down significantly.
If you’ve already racked to clean jugs… then it’s perfectly fine. Leave it to age before bottling. If you bottle it too early, it will be overly sweet and not very alcoholic.
If the wine has just gone into the carboys right from the initial ferment in the large pot, then you should see some bubbling. Maybe not active popping in the airlock, but some evidence of it. If you don’t see anything, pop open the carboy and add a bit of yeast energizer. You’ll want to add just 1/4 tsp per 1 gallon. Then cap it with the airlock again. That should start it bubbling.
Good luck!
I find that adding a plastic bag after the airlock is a good way to actually monitor the volume of bubbles I get, but make sure to empty it before it’s full:) In my second ferment, towards day #12-14, I noticed that the bag wasn’t inflating anymore (in a 24 hour interval), I guess this is the signal when it’s time to rack it up.
Great step by step guide to better understand the process. It’s my first time at making wine and I’m super excited to try it! I live in Laos and we get TONS of amazing and cheap fruits in season. Imagine, fresh plums (really small and juicy, very deep color) at about 0.33$USD per kilo…. We have about 100kg of plums ready to start our second batch in 2 week.
What a great tip! Thanks for sharing!
Thank you for sharing this info! I have 25LBS of plums in a 5 gallon fermenting bucket. I have not added the sugar or yeast yet. There was only enough room in the bucket for me to add 1/2 of the boiling water. Could I continue the process this way and then add the rest of the water (prob not boiling though) when I rack the wine? Or should I try to divide the must between 2 containers? Thoughts?
Sorry, I was away camping… so hopefully my reply is not too late! I would divide and do two batches. The boiling water helps breakdown the plums and kills any mold or yeast that might already be on the plums. However, if it’s too late, then you can add water (not boiling) when you add the yeast and sugar. Cheers!
I’m 9 month in to the process and patiently waiting to open my first bottle. How long does it last after opening the bottle?
After opening store the bottle in the fridge. It should last for at least a month, though you’ll probably finish it sooner than that! We just opened our first bottle from last summer, and it is so good.
Hello. Just wondering if this recipe can be used for red plums and black plums? Then you.
Yes! Whatever mix of plums you want will work nicely!
hi there, I’ve realised I added the juice of one lemon instead of one teaspoon, will this affect the wine? I’m on day 5 of the 4-6 day initial ferment and all is bubbling and smelling of hot cross buns which feels like a good sign, is the worst outcome going to be a flavour change?
many thanks!
You are correct. The extra lemon won’t harm the fermentation, however, it will give the wine a bit of extra acidity. I’m sure the experiment will work out. Cheers!
I did the same with the lemon, ugh…I decided to steep a couple of tablespoons of lavender in while the water was hot! We shall see!!
Lavender is an interesting flavor addition. I would love to know what you think of the flavor! (I realize it will be a year from now, when you’re finally drinking your wine.) 🙂
Thanks for the detailed recipe. Can regular bread yeast be used instead of champagne yeast? What do you think could the difference in the final product?
Cheers
Bread yeast will die off after about 5% alcohol. So the result will be a very low alcohol wine that is very sweet. I wouldn’t recommend it. If you want to make a bread yeast-based alcohol, I recommend my bread kvass recipe: https://www.fermentingforfoodies.com/traditonal-sourdough-kvass/
In my case being in Laos I couldn’t find wine yeast:/ I used Angel instant dry yeast and I would guess its fine. Bubbled all the way until day #11ish of second fermentation. It is also mentioned on the packet that it is ”sugar tolerant” yeast.
Is that 10 months aging total from step 1 or 10 additional after bottling?
Thanks! Just made three batches and looking forward to it!!
Ten months from step 1 is usually fine for plum wine. However, it tastes even better if it’s over a year old. I usually get impatient and drink a bottle after 8 months and it really isn’t as good. Enjoy!
First timer. We have a plum tree and I typically just make jelly each year but decided to give wine making a try. Have several gallons of plum juice frozen – just whole plums cooked and juices through strainer. Can anyone tell me how to convert a recipe to use juice? Have capacity to make up to 5 gal batch. Appreciate any assistance.
I haven’t used juice to make plum wine. However, I have made fruit cider from juice. https://www.fermentingforfoodies.com/how-to-make-hard-apple-cider-from-juice/ Cider and wine are exactly the same process. The only difference is that cider doesn’t ferment for as long. Luckily plums don’t need any extra additives to turn into wine (as you can see from this recipe). So feel free to add the full amount of sugar to your plum juice and let it ferment for several months before bottling.
I recommend racking and bottling as described in this plum wine recipe. Otherwise, the dead yeast will give the wine an unpleasant flavor. If this seems too difficult, then maybe just make cider? Plum wine was my first ever homemade cider/wine experience, and I was surprised by how good it was! Enjoy, Emillie
What would you say is a cup
1 cup = 250 mL for fluids.
I had a lot of plums and bought a wine making kit at a home brew store but I’m worried it is too big for this recipe. The primary fermenter bucket is 7.5 gallons and the secondary carboy is 6 gallons. At what point if any should I be worried about oxidation? Should I downsize to avoid? Also in the primary fermentation step are you plugging the hole in lid of the bucket?
Primary fermentation (with the fruit) is done open to the air. Just be sure to cover it with a towel to prevent an infestation of fruit flies. Oxidation is more likely to occur when moving liquids (into carboys and when bottling). Just go slow so you don’t splash. I guess if the carboy is WAY too big, you may want a smaller one, but it’s not necessary. Enjoy!
Great recipe that i plan on trying today!
Can you use honey instead of sugar or half of each?
Hi Alicia,
If you add raw honey to the plum wine, then you’ll end up with a mead like beverage. Honey naturally contains its own strains of yeast and bacteria. I recommend just sugar for plum wine, and most of the sugar will be eaten up by the yeast. It’s really not sweet. Good luck!
Hello, I just harvested Italian plums from our tree in the backyard. I would like to get some of a sweeter wine as a product, could I adapt something on this recipe to achieve that result? more sugar? a different type of yeast?
Also, I am wondering if instead of adding boiling water to the mashed plums at the initial stage it would be better to boil the fruit in the water and then dump everything in a container to rest for a few days or add the plums to the boiling water for a few minutes. I’d love to hear your thoughts. I will be venturing into making wine for the first time and I don’t want to mess this up 😉
Thank you (I am really enjoying your webstite)
Thanks for the compliment! You have three options for making a sweeter plum wine. 1. If you add more sugar the yeast I’ve suggested using will continue to ferment until it dies out at 18%… so quite a high alcohol content wine. That wouldn’t be my recommendation. 2. You could choose a yeast with lower alcohol tolerance. There’s a few that will die off at 14%. Just ask at your local homebrew supply shop or look online. Amazon does post alcohol tolerance on their yeasts. 3. Most sweet wines use sulfites to curb the fermentation. That would require you to test the wine periodically (for sweetness and alcohol levels) then add sulfites to stop the fermentation. It’s a bit more complicated. Probably the easiest option is to find a lower alcohol yeast.
As for boiling the fruit… the boiling water is mainly used to kill any surface yeasts, bacteria or mold. It isn’t meant to cook the plums. You actually don’t want to cook the plums so I recommend pouring over boiling water rather than boiling the fruit.
Plum wine was the first type of wine I tried making, and I’ve never had a failure. Hope it works for you! Good luck!
I have started my first plum wine after “inheriting” an orchard with the property I bought. The first batch is with peach plums. The next batch is the wild plums (I have 3 varieties of the little thumb sized wild plums). Then the Italian plums and prunes will come in. I plan to try a melomel with at least one batch. But I have a question. As I researched recipes, I noticed several similar to yours, but several don’t add the sugar and lemon juice and yeast for 4-6 days. Do you add yours at 24 hours to control the yeast? I noticed mine had considerable natural yeast on the skins and did wash that, so that was my guess as to why you’d prefer to put the champagne or wine yeast in sooner. Thanks again for your great site.
Wow! That orchard sounds amazing. I’ll admit that I wrote this recipe up a few years ago… and have enjoyed following it every summer since then. I’m not sure why people would ferment without the yeast, sugar and lemon juice. I guess to develop natural yeast? However, it would also increase the risk of bacteria also colonizing the fruit, and that is definitely not something you want. The yeast will out-compete any free-range culture ensuring a reliable ferment.
I’m really interested in how the different types of plum wines taste. If you remember next spring-summer, let me know! Cheers, Emillie
When you switch from one carboy to the new clean one, do you still use the airlock??
Yes! It needs to stay away from contamination for the whole process, including bottling. Good luck!
Hello.. this is my first attempt.. Can I just confirm that for the first 2 weeks it has the airlock and then for the next stage (2 month fermentation) it also has an airlock for the full two months? Thank you for the recipe!
Yes! It will continue to ferment… just a lot more slowly. Cheers, Emillie
I have a question. After the first 2-week fermentation in the carboy, your instructions say to transfer to a clean carboy for another round of fermentation. Then it says after 2 months move to bottles. Am I leaving it in the second jug for 2 months or is that saying a total of 2 months from day one of starting this batch if wine? Thanks in advance!
Yes, move after 2 months total. Although an extra 2 weeks won’t matter, leaving it to sit with the dead yeast for longer than 3 months will give the wine a really unpleasant flavour. (Talking from experience!)
Hello from Europe! This looks like a very nice recipe, thank you. I wonder if you could add metric measures in to your recipe to make life easier for us Europeans? For example, I have no idea what size a “cup” is 🙂
Thank you!
Gavin Alexander
I’m in Canada and can do both. But most of my readers are in the USA. 1 liquid cup = 250 mL and 1 lbs = 454 g. 🙂
Hi, thank you so much for sharing this recipe! I’m currently at the carboy stage. However, I will have to leave my place for two months in around a month in a half…I was wondering which option would be best – bottling after three and a half months or after a month and a half? Thank you!
I recommend racking to new jugs before moving, then you’re fine to bottle it at 4 months. If you bottle it too early, the wine will continue to ferment and carbonate. Bottling too late will give the wine a bad flavour from the dead yeasts. Racking at 1 month will remove most of the dead yeast. Good luck with your move!
Ok, thank you so much!!
After pouring the boiling water over the plums do I leave the plums in the water for 24 hours?
The plums stay in the water until it’s racked into jugs. The boiling water just kills any surface mold on the plums, then becomes the liquid for the wine. 🙂
Should I use a pectin enzyme please? I have read that plums contain a high degree of pectin. I’ve scrolled down through the comments but cannot see it mentioned.
I haven’t added it to our plum wine. We use a variety of plums that naturally breaks down during the ferment. (I do recommend it for pears and peaches). However, if you have a very firm variety of plum and wanted to use it, add a 1/4 tsp per batch with the lemon juice. Cheers!
Hi there, I have started my plum wine, and all’s been going well so far. I have done the first two rounds of fermentation and its now in the demi johns for the last time before bottling. You say to leave it like that for 2 months but after two weeks it has stopped fermentating. (not movement of bubbles through the airlock) is that OK and should I just leave it as you recommend.
You could bottle early… I generally find that wine will keep fermenting at a much slower rate for a while after the initial fast ferment. However, the bulk of the fermenting is definitely over. We didn’t get any plums on our trees this year… first time I’m not making plum wine in at least 5 years! Enjoy!
Do you keep the wine in an open jar for the last fermentation? Nice recipe by the way 🙂
Oskar
Hum… the initial ferment is done open (with a towel or something to keep out the fruit flies. Then it goes into an airlock-type container for the rest of the fermentation. Bottled at the end. By the time you’re bottling it, it should have finished fermenting, so there won’t be much (any) carbonation. Does that answer your question? Good luck! Sadly, we didn’t get any plums this year. First time in a long time.
Hi Emily. I’m making plum/apricot wine for the first time. It’s a little confusing since I have only made muscadine grapes wine. When you refer to putting the mixture into a pan, can I use the same buckets I use for my other wine? Thanks
Yes! If you have a large fermentation bucket it’s way better than a pot. Especially if you have an airlock (otherwise, you’ll release the pressure when you stir every day). I live in a tiny house and unfortunately don’t have space to store large brewing buckets. Luckily, I’ve never had an issue doing my initial brew in a pot. Cheers!
I am giving this recipe a go, using “Ittalian Prune Plums”. After the xxxfirst week in a carboy the fermination came to a stop, I was hoping I could get some insight. Being it has a whole week to go before the racking and sitting for two months.
I haven’t tried Italian prune plums… however, they should work fine. Two thoughts: are you sure it’s fully stopped? It might have just slowed down a lot as the sugar was used up. It’s usually only active for the first 2 weeks (one with the fruit and one in the jug).
If you’re concerned that it stopped early, you could always check what the sugar levels are at. If you don’t have a hydrometer you can taste it. It won’t taste good (ageing is required for that) but you should be able to tell if it’s quite sweet. If it’s still quite sweet add a 1/4 tsp of yeast energizer, which will help kickstart the ferment.
Good luck!
Just to be clear, the 16 cups of water become part of the wine for 5 lbs of fruit, is that true? I have 78 lbs of cut Santa Rosa plums frozen from summer harvest so 15.6 x of your recipe. so that is 15 gallons of water. does that sound right??
Yes… the plums ferment in a mixture of water and sugar. And the water goes towards the overall liquid. 78 lbs, phew! I’ve only ever made a triple batch before. Enjoy! 🙂
Hello,
While the wine is aging in the bottles for ten months what temp do you store it at. Thinking it shouldn’t sit at room temp while aging?
Also, I’m looking at kegging five gallons for cider. Would you cold crash the fluid at two months into aging for cider? I thought I read that on another of your sites. I’m working with 150 lbs of plums so trying to mix it up.
Thank you
Andy Reynolds
Hi Andy,
If you have somewhere cool (around 15 C/ 59F) to store your wine, that is probably best. We just stash it in a cool-ish closet. I’ve never cold crashed my brews… mostly because my fridge is always full and I don’t have anywhere to do it. But you definitely could do it to help clarify your cider. Enjoy!
Cheers, Emillie
Hello, I had to freeze my plums. They have been washed put in the freezer. Do you know if I could make wine with them?
Yes! As long as they don’t have freezer burn, they should be fine. Enjoy!
Thank you!!
Still in the process of making this but it’s looking good. Only thing I’d look at changing is when you boil the water to add the sugar then. The sugar I have is more raw than normal so it’s harder to dissolve in ward/cold water. It came up with an appx 12.5% abv but there was a bunch of undissolved sugar on the bottom so I’m sure it potentially will be higher if I was able to mix the sugar enough.
Thanks for the feedback! We’re set to make our yearly batch in the next week or so. (Just waiting for those plums to ripen!) We don’t add the sugar until we add the yeast, which helps prevent contamination. Because the sugar might start feeding wild yeasts rather than the commercial wine yeasts. However, maybe you could reserve some of the water to dissolve the sugar prior to adding it to the pot? Enjoy!
I am sorry. I think I said pan and it should be pot.
Hi. Going to try your recepie for the first time. Do i need to add sugar? Best Arve
Hi! The alcohol content of the wine is determined by the initial sugar content. I find that this wine is usually around 12.5 ABV using the amount of sugar listed in the recipe. Without any sugar, it will probably end up at about 4 ABV. Cheers!
Hi ,
I am about to try this recipe and have ordered sachets of the lalvin ec-1118 yeast. I’m not sure how to rehydrate it. It says put the yeast into warm water and then add must but I don’t know what must is? Any ideas?
Thanks
Hi Brittaney, Must is the mix of fruit and water (or juice). Basically, it is “young wine”. 🙂 I think they want you to rehydrate the yeast in water then add it to your wine.
Thank you
Just wondering why you mention that fermentation happens only in carboy. Why transferring to bottles stop fermentation. I am a bit confused here. Appreciate a reply 🙂
Transfering to bottles doesn’t stop the fermenting. However, if you are bottling wine, then most (all) of the fermenting will be done by the time you bottle it. However, if you are bottling early for a cider-like beverage, then it will ferment in the bottle. The majority of the fermenting happens in the first 4 weeks. Cheers!
Thank you so much. I am following everytiing as you describe. In other words, I am also going for the plum cider. I transferred some young wine to bottles after the first fermentation. But what is the further process. Just ready to drink, or need further processing? Thank you so much 🙂
I also always make a few bottles of cider. If you’ve bottled some young wine, then I recommend popping it in the fridge right away. It will still ferment and carbonate, but at a slower rate. If you leave them out on the counter for any length of time, then you risk over carbonation! Enjoy!
This is my maiden voyage into winemaking. Thank you for the detailed recipe. My question to you is the following: have you ever tried doubling or tripling the recipe? Thank you in advance. I’m looking forward to the results!
I have scaled up! My brew pots hold 2 batches and 3 batches, so I often make double or triple batches. Enjoy!
Hello Emillie this is my first time making wine. I am at the stage of transferring into the second Carboy to ferment for 2 months I used a siphoning hose that way I left behind the stuff at the bottom of the first carboy behind, was that alright or should I have put everything in the second carboy including the stuff at the bottom? Hopefully I didn’t mess up. Then after 2 months do I wrack it into bottles and Leave it for 8 months then that would be 10 months total from start to finish is that correct? Hopefully this isn’t to confusing for you. Thank you very much for your time and your recipe.
Hi Robert,
You definitely want to leave the sludge behind. It’s the leftover fruit pulp mixed with dead yeast, and it won’t help your wine taste good. And be sure to leave the sludge at the bottom behind when you bottle it, as it will definitely be spent yeast. Sounds like you have the right info. Enjoy!
How do I get the wine clear please? Mine is very cloudy. Thanks from Montana
Hi Thomas, Racking helps to clarify the wine. Typically, the sediment (from the plums and yeast) settles to the bottom of the jug. Then you can rack just the clear liquid from the top of the jug. You can also add a wine clarification agent (like pectin enzyme or tannin). However, I don’t typically use these with my plum wine. However, if you really need to clarify it, try 1/8 tsp of pectin enzyme for the batch. Cheers!
Thank you so much. I am following everytiing as you describe. In other words, I am also going for the plum cider. I transferred some young wine to bottles after the first fermentation. But what is the further process. Just ready to drink, or need further processing? Thank you so much 🙂
We just bought a house that has a small orchard in the back! So excited to make some fruit wines. I’m doing a 5 gal batch right off the bat which is scary. My question is I bought a carboy and borrowed one from a friend. They are 2 different sizes. Is it ok to have air at the top for the second fermenting process?
Having a bit of extra air at the top of the carboy isn’t an issue. It’s better to have too much extra space, than too little as the wine can actually bubble up into the airlock! Enjoy your orchard!
Is it an issue if there is around a gallon and a half of extra head space in the carboy for the second ferment? Have a five gallon carboy, but only 3.5 gallons water added for my 17.5 lbs fruit.
It might end up a bit oxygenated, so it may turn brownish at the top. But it shouldn’t be a huge issue. It is hard to fill a full 5-gallon carboy. Cheers!
Hello! I am excited to try this. We have a plum tree and I’m finally going for it this year. My question is, what equipment do I actually need? I’ve looked into winemaking kits or just purchasing individual items but it can add up quickly. For first timers like myself could you give a list of the necessary equipment? Thank you!
I have a post on wine-making equipment: https://www.fermentingforfoodies.com/cider-wine-equipment-supplies/ Luckily plum wine is easy, so you don’t need all the additives. If you don’t get a hydrometer, then it should only cost you about $20 for the siphon and airlock. You can do the first ferment in a large pot. And hopefully, you can buy/borrow large glass jars to use as carboys. I got mine from fruit juice and a refill store. They don’t have to be 1-gallon. I made so much wine this year that I was stashing it in all sorts of juice jars! Good beer and wine stores should carry a bunch of different size plugs for the airlocks. Likewise, the bottles were free: from beer, sparkling lemonade, and cider. Ask your family and friends! Someone will probably have a stash of bottles.
If you really can’t find anything to use as a carboy, then make plum cider instead. Just do the initial ferment in the pot for about 7 days, then bottle it right away. The bottles will still ferment quite a bit, so stash them in the fridge to slow it down and try to finish it within 4 weeks. Whatever you do, don’t skip buying the sanitation chemicals. It’s really the best way to make sure your wine tastes good. Good luck!
Hi! Wondering about the cider, I just did one bottle and put in the fridge. How long should you wait before drinking?
It’s really up to you. The longer you wait the drier it will get. I tend to enjoy a bit of sweetness in plum cider. So check it after 2-4 days. Pop the bottle and taste a bit. It should be sweet, yet sparkling. Enjoy!
Hi Emillie,
After adding the “leftover” to a bottle that can take carbonation and popping it in the fridge as you mentioned for a cider, is it ready to drink or do I need to wait a certain amount of time?
Thanks, Lucille
nvm, i found a response in the earlier comments! Thanks.
Glad you found it. I’ll update the recipe to include that info now. Enjoy!
Hi Emilie,
The cider is a bit too `strong` for me and not sweet enough (for me). Do you recommend adding extra sugar at this stage (stayed in fridge 1-2 weeks)? Thanks 🙂
Yes, that does happen. It’s why this is more of a wine than cider recipe. 😉 You can add a bit more sugar. I usually mix it with a bit of apple juice. That will both dilute it and sweeten it.
is it possible to sweeten plum wine after fermentation has ended
Yes! However, I recommend waiting until the wine has fully aged as the flavor really takes time to develop. At that point, you can either mix it with a sweeter wine (for a blend) or just add in a tiny bit of sugar. Enjoy!
Hi from NZ – my 1st winemaking (I’m pretty novice in a kitchen) but I’ve got inspired by you and have my 3rd double-batch from this season’s harvest on the go. The cider from the 1st batch 2 weeks ago seems pretty good, and not cloudy (poss up to 14% abv).
My question is that I decided to de-stone the plums for first couple of batches (certainly time consuming, and skin-pigmenting) but did the last dbl-batch with the stones (just broke the skins) – but I hadn’t altered your recommended proportions of plum-weight to water-literage. Would that matter? (I don’t know what the stones weighed separate of fruit) If so, can I tweak anything during the subsequent process?
Also I had to de-cant from my initial ferment barrel to 1st carboy (failed at siphoning, mine was more like bailing). Have I risked oxidation too much at that stage?
I’ve got a proper siphon now, and things looking good during sec fermentation. Cheers and thanks for a great website
Hello. I’ve never made any wines or ciders before. I have a Shiro plum tree with many ripe plums. They are by nature VERY juicy, golden plums. Their skins sloth right off when ripe and they’re swimming in juice so it feels weird to pour boiling water over them. Is the added boiling water needed for the recipe or just for sanitation? Otherwise, I was wondering… to make jam, I slip off the skins and boil the flesh for 5 mins so the pits come off (they are clingstones so boiling & a brief mixer swirl allows a slotted spoon to easily remove the pits). Wouldn’t that accomplish the same sanitizing? I would also prefer a sweeter wine so it sounds like I would need a different kind of yeast based on other comments… Thank you for your help!
Hi Elaine, I’ve never tried Shiro plums before! The boiling water both kills the natural yeasts and bacteria that might be on the skin of plums and provides the liquid for the wine (balanced with the added sugar). Hum… probably the best way to ensure a sweet wine is to stop the fermentation early (with sulfites or refrigeration). Regardless, it’s still quite a sweet wine. It sounds like your Shiro plums will make it even sweeter. The wine yeasts eat sucrose (from the added sugar) but the sweetness of the fructose will remain. So a sweet plum should result in a fairly sweet wine. Enjoy!
Do you use the whole package of yeast? I’m using Lalvin EC-1118, the same one you have a link to. My understanding was that this package could be used for a 5 gallon batch, so I’m wondering if it’s too much for a 1 gallon batch.
Thanks for the recipe. I’ve made a lot of beer over the years, but this is my first attempt at wine.
Use the whole package. This recipe starts with more than 5 gallons. (4 gallons of water + a whole lot of plums). However, if you’re making a smaller batch, then definitely divide your package of yeast. Cheers! Emillie
Hello, again. I have 2 questions. I know others have asked versions of these but it’s still tricky to me. I’m hoping to end up with a sweet plum wine. So far, ours is very dry even though I used D-47 yeast. (But at least it tastes like a wine. Yay! : )
1. I started making my wine on July 2nd. Does that mean it should stay in that second carboy until Sept. 2nd? And that’s when I should bottle it? That would make a total of 2 months fermenting.
It went into the 1st carboy on July 10th & into the 2nd carboy on July 29th. It just seems like a long time–about 4 weeks–in the second carboy. Does it sit longer in the second carboy because most of the sediment is gone?
2. In another comment you said it’s best to sweeten the wine (if we choose to) after it’s aged by adding another wine or sugar.
a. Wouldn’t “after aging” be after it’s been bottled for the year?
b. If so, do you mean adding a sweetner to each bottle? (add and shake?) I thought we weren’t supposed to open bottled wine…
Thank you for the clarification!
Great questions! 1. You should bottle two months after the second racking… so nearly three months of fermenting. However, it’s a flexible thing. I wouldn’t leave it much longer than 4 months total as the dead yeast will give the wine a bad flavor. The point of the second carboy is just to give it time to make sure ALL the fermentation is done before you bottle it. Otherwise, it will end up carbonated.
2. I make pear and peach wine as well. Neither of these fruits has the nutrients to feed the wine yeast. So they always end up a bit sweet. I like to blend them with drier wine to cut the sweetness. I usually do that when serving (to taste).
However, if you want to sweeten the plum wine, then you can do it in the second carboy or when bottling. The goal is to add the sweetener after the fermentation is done. However, it may still kickstart the fermentation. So you should probably add it to the second carboy, and see if it starts bubbling. Alternately, you can add sweetener with sulfites, which will ensure that the fermentation doesn’t restart. I am fairly sensitive to sulfites, so I haven’t personally tried it. I imagine that the staff at a UBrew store will be able to tell you how much sulfites to add.
Cheers, Emillie
How much wine can I expect to get from 5 pound of plums?
It makes about 3 1/2 bottles (standard 750 mL bottles) of wine after all the sediment is racked out.
When doubling the recipe, do I double the number of yeast packages, too?
Thanks
Yes! Otherwise, the ferment will go too slowly.
Can you tell me please followed instructions for plum wine but now in carbon for fermenting and has mould on top is this nowthrowaway thanks
I’m sorry to hear that you have mold. It’s always sad to lose a ferment. The wine is not safe to drink, as mold can live inside the sweet liquid, even though you only see it on top. Here are a few ideas of what may have happened: 1. Was there mold on your plums? 2. Did you sanitize everything? 3. Do you have a lot of mold in your house? 4. Are you using a well-fitting airlock with water in it? 5. Did you use active commercial yeast? Hope that helps! Cheers, Emillie
I like to freeze my fruit – (rhubarb) before pressing/juicing it, to break down the cell structure and release the juice. I am thinking of freezing the plums then thawing, mashing and fermenting as you describe. Do you see any downside to this?
I make 5 gallon batches, so am planning on starting with 20 lbs of plums and ~4 gallons of water – or as much will fit in a 5 gallon pail.
Last time I made plum wine, I had suspended solids in the bottom 1/3 of the carboy (secondary fermenter) . Thoughts on why that was? The final product is not the gem folks here are describing. I store it at room temp and drink it that way as well. Why does this need refrigeration right after bottling? Mine is drinkable, but benefits from a wine conditioner (sweetener) – also I didn’t wait 10 months to bottle. Why is that important?
Hi Kevin, I don’t see any issue with freezing the fruit. However, don’t use fruit that has freezer burn or has been in the freezer for more than 6 months. It just won’t taste as nice.
As for the wine, you should filter out most of the solids before moving it to the secondary fermenter. I’m surprised the carboy for the second fermentation would be 1/3 solids. I usually have just the tiniest amount of solids. It’s also important to rack into a clean carboy after two weeks into second fermentation. It removes the dead yeast and is crucial for flavor development. Leaving dead yeast in the carboy makes the wine taste bad.
The wine is bottled after two months, then aged for 10 months before drinking. Aging really helps with the flavor. If you don’t like the flavor, it may need to age for longer. I don’t refrigerate after bottling. My bottles are all stashed in the back of a dark closet. I do like drinking it cold, but that’s a matter of personal preference. Hope this helps! Cheers, Emillie
Hi Emillie,
Thank you for your reply…. Very helpful. I think I’ll open a bottle of my prior year batch and see it has improved. Kevin
When I moved the liquid to the carboy for the first time (after primary fermentation) I left a lot of yeasty sediment behind. Now (2 days later) the wine is not bubbling very much. Did I make a mistake and remove all the yeast?
The wine should slow down after the first few weeks. So it’s perfect that it’s not bubbling as much in your second set of carboys. It means that most of the sugars have been consumed, but there is still plenty of yeast. If you were bottling for cider and concerned about carbonation, you could add a bit more sugar and the ferment would kickstart again. However, your wine is probably getting close to 12-14% ABV. You just want to wait until the bubbling has completely stopped before bottling, otherwise, your wine will be slightly bubbly. Cheers, Emillie
Sorry, I meant that the wine was currently in the first set of carboys, having just been moved from the pot. It’s been just over a week since first starting the process. Is this still okay?
Yes, it’s still fine for the bubbling to go slow. It should actually have completely stopped by the time you rack it to the second set of carboys. But variations on temperature and yeast strains will change the speed of the ferment. If you are concerned, taste (or test with the hydrometer) a little bit when you rack to the second carboy. It won’t be smooth (like after aging) but you should taste the fermentation (less sugar, alcoholic flavor). Cheers!
my first attempt at plum wine but instead of leaving it in a pot for 24 hours in strained the solids off and the liquid straight into a carbon with airlock tomorrow I will add sugar lemon and yeast then put the airlock on let it ferment in the carbon for 2 weeks or until it slows down the siphon into a clean sterile carbon.
we did 2 gallons of blackberry wine, using yeast and sugar, absolutely no added chemicals it turned out very good by the tasting while transfering
Blackberry wine sounds amazing! I’ll have to get out and pick enough for a batch one year. Thanks for sharing!
so after mashing plums for 45 minutes the setting it aside to cool. I then transferred the juice to a gallon carboy. added lemon sugar. what happened after that I don’t know, but the sugar solidified in the bottom of the jug but I had added yeast and it did not start to bubble through the airlock. so I returned it to a sterile pot and warmed the liquid so the sugar would dissolve added more yeast set it aside next thing I had a volcano of foam coming up through the airlock. so I left it to do its thing. this morning I cleaned the airlock of foam. set it back covered it. then it went to work all the little yeast guys eating sugar. and are they hungry a constant burping through the airlock
It can be hard to dissolve the sugar. One option for next time is to stir with a sterile spoon for a while. Or you can dissolve the sugar in boiling water first, then add it to the carboy. Glad it’s fermenting nicely! Cheers, Emillie
hello!
I busily started this recipe before Christmas and forgot to add sugar and yeast after 24hrs. It’s now day 6 of fermentation and it’s bubbling away nicely (Southern Hemisphere) can I add sugar/yeast now? leave it for another couple of days then put into demijohns?
thankyou!
You can definitely add the yeast and sugar now. The only trick is that the current bubbling is from free-range yeast, so it’s not necessarily going to be tasty. The commercial yeast will out-compete the free-range yeast. However, you may want to taste just a little bit before finishing the process. It won’t taste amazing (aging helps with that) but it shouldn’t taste awful. If the flavor is fine, then definitely add the sugar and yeast now, when you move it to the carboy. Good luck!
Hi there! I have never made wine before, but I have a BUNCH of plums this year and was wanting to try your recipe. This is probably a dumb question, but during that first fermentation phase, in the pot, we leave the mixture in the same pot for 4-6 days? With just the pot lid over the top? is that correct? Thank you!
Yes, The initial ferment is in a pot with a lid on it. I use a pressure canner, so it happens to have a nice seal with a gasket. If you happen to own a large-mouthed container that can fit all your fruit, then that’s fine too. It will bubble quite vigorously, so make sure that whatever you use will allow plenty of C02 to escape. It is key to stir it daily with a clean spoon. We always soak our stirring spoon in boiling water before stirring to prevent any contamination.
Enjoy!
Hello, thank you for the recipe and all the tips. How much should we mash up the plums? Is just breaking the skin good enough, or should we really mash it up?
Usually, the boiling water does a pretty good job of splitting the plum skins. The mashing is just to loosen up the flesh. You don’t need to spend more than a few minutes on it. Enjoy your wine!
I have plum and chokecherry juice canned in quarts. I use a steam juicer and don’t mess with mashing the fruit, etc. could I start the wine making process using my canned quarts? How much water would I add? I tried making wine a few years ago and it all became a thick liquid. I’d love your thoughts on both these things.
Hi Teresa,
I’ve made wine with juice as well as whole fruit. Though I find the juicing process to be a bit long, which is why I pretty much do whole fruit now. 😉 Working with juice is easier! You can pop it into the carboys for the first week of fermenting and leave it there until racking (after 3 to 4 weeks, when the bubbling has calmed down). The best way to set up the initial ferment is to use 100% juice (no added water), then add sugar until you get to the desired ABV (based on hydrometer readings). The yeast and lemon juice are enough for a 1.5-gallon batch. I haven’t made wine with a mix of juice and water before. I’ve only used water with whole fruit or straight juice.
Bacteria is the usual cause of a fermented liquid becoming thick. So I’m guessing that your previous batch of wine was contaminated with a wild strain of bacteria. If you were making pickles, my advice would be to continue fermenting as the gelling bacteria isn’t an issue. However, with wine, it’s important to prevent bacterial contamination or you could end up with methanol in your wine. To keep the bacteria out, make sure that you sanitize everything before it touches the juice or wine. And use an air-lock to prevent contamination.
Cheers, Emillie
Thank you so much for the information! I appreciate you taking the time to reply. I’ll give it a try!
Lots of wonderful comments here! Fun to read (but didn’t read them all, too many).
How long will plum wine last? Is it like other wines – lasts for years (properly managed)? Does it improve with age (after 10 months) or deteriorate (again, properly managed)?
I recommend waiting at least 10 months. We make our wine in August and typically start drinking it in June of the following year. I don’t find that the flavor changes much after the first year, but it will certainly last for several years if stored in a coolish dark location. We’re just finishing off the bottles from 2021. 🙂 We tend to drink through them so we have space to store our next batches of wine.
Enjoy! Emillie
I have 50 Lbs of plums, I would like to use them for this recipe, but don’t want to consume 30Lbs of sugar.
Could I still make this with good results with less sugar?
Yes! Do you own a hydrometer? The sugar, fruit and water need to be balanced so that you have the right amount of sugars to make wine. So you’ll need to reduce the water as well as the sugar. Otherwise, you’ll end up with a low-alcohol wine. The initial gravity reading needs to be between 1.07 to 1.10. Cheers! Emillie
We’re on the step that states:
“After 2 weeks, rack the wine into a clean jug for another round of fermentation. (This is to remove the spent yeast, which doesn’t taste good. Skipping this step will result in a not-so-tasty wine.)”
Does this just mean we transfer it from the carboy into another clean clear jug with a sealed lid this time?
You are partly right. Racking means moving into a clean jug, but cap it with an airlock. It will still continue to slowly bubble for a few months. Enjoy!
Thank you so much!
We realized today that we haven’t really seen any bubbling. How noticeable should it be? Is there anything we should do?
You won’t be able to see the rapid bubbling after moving into the clean carboy. Most of the fermenting is done in the first few weeks. 🙂 It sounds like it’s working perfect. Cheers!