

Want to know the secrets to an amazing loaf of bread? Here are the tips and techniques that bakeries use to make artisan-style sourdough bread.
This post is written in collaboration with my husband, Brad. As some of you may know, I’ve been gluten-free since 2009. Though I’m not celiac, I certainly can’t be offering advice around making sourdough bread! However, Brad has been baking sourdough since 2002, so he has plenty of experience.
Here are the tips and techniques that Brad uses to mix and shape his sourdough bread.
1. A Good Sourdough Starter
The key to an amazing loaf of sourdough bread is a healthy sourdough starter.
- If you really want a really healthy sourdough starter, then you need to start one from scratch. If you’re new to fermenting, it can take up to 2 weeks to create a healthy and active starter.
- There are no store-bought short-cuts for a healthy sourdough starter. The culture in a starter is dominated by the wild yeast in the flour and your home. So getting your neighbor’s starter, isn’t actually a shortcut over creating your own.
- Air pollution, mold issues, or HEPA filtered air can make it difficult to maintain a traditional starter. In that case, I recommend making a quick sourdough starter using a yeast-based fermented beverage. The flavor won’t be exactly the same, however, you will be able to bake a decent loaf of bread.
2. Hydrate the Flour:
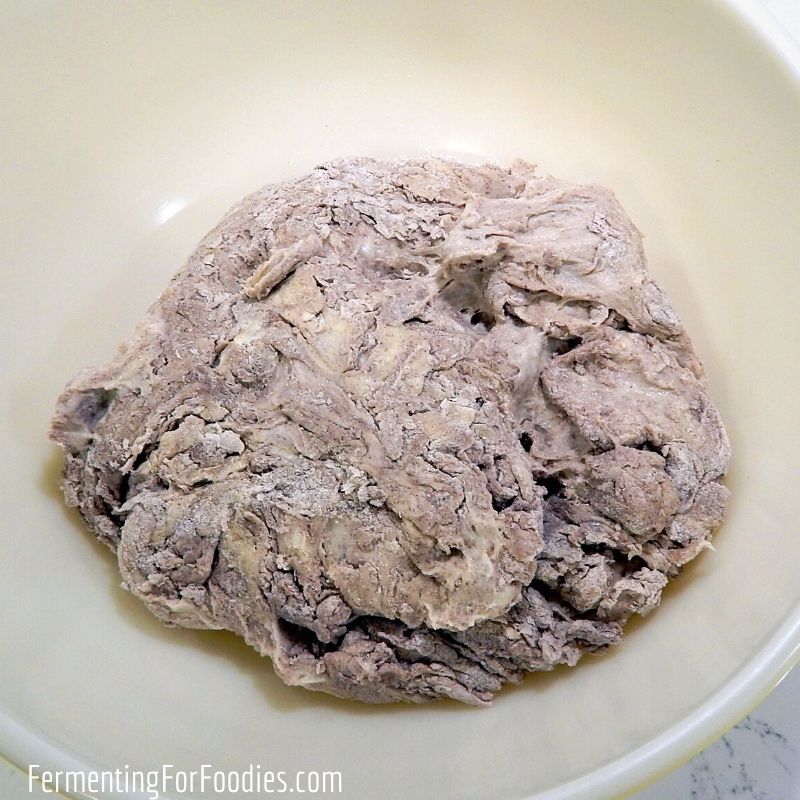
- When making bread, mix the flour and water first, then allow them to sit for 15-30 min before adding any other ingredients.
- This allows the flour to fully absorb the water and activates the enzymes in the flour. This results in a softer and better-flavored bread. If other ingredients (salt, yeast, etc.) are added right away then the flour will harden before the enzymes are activated.
- Usually, mixing the flour and water together results in a very dry dough since a lot of the liquid is provided by the sourdough starter.
- Rub the dough with your fingers to make sure that it is well mixed.
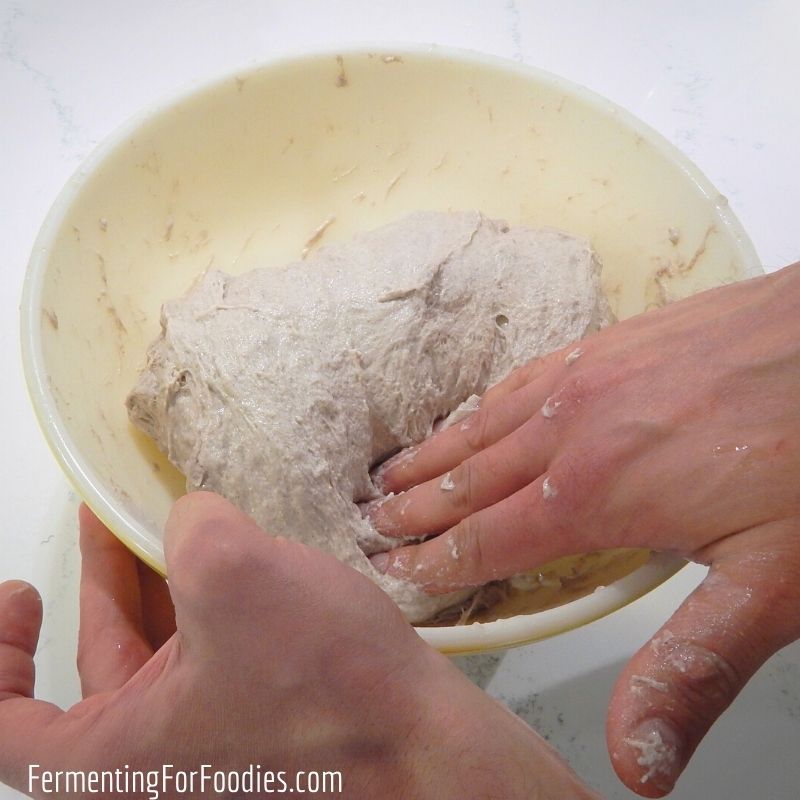
3. Mix With The Pincer Method
After the flour has hydrated for 30 minutes it’s time to add in the sourdough starter, salt, and other ingredients. This is quite tricky because it involves mixing a wet sourdough starter into a dry flour mix.
The best way to do it is with the pincer method. It is a technique that involves folding the dough and pinching through the folded layers of the dough to cut in the added ingredients.
- Add all the ingredients to the hydrated flour.
- Using your thumb and forefinger, pinch through the layers of dough.
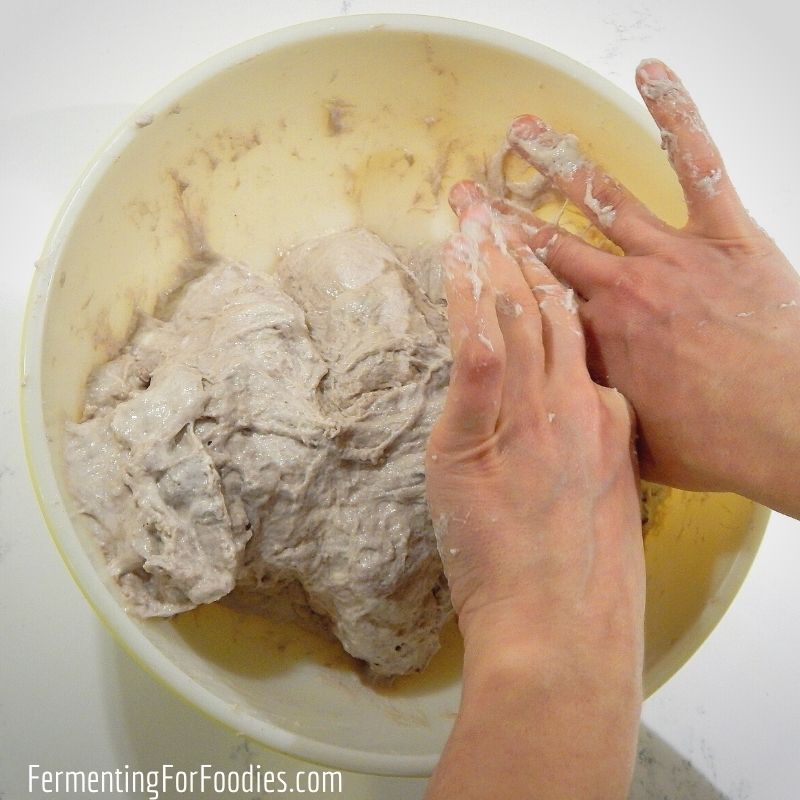
- Fold the dough in half, then pinch through the layers again.
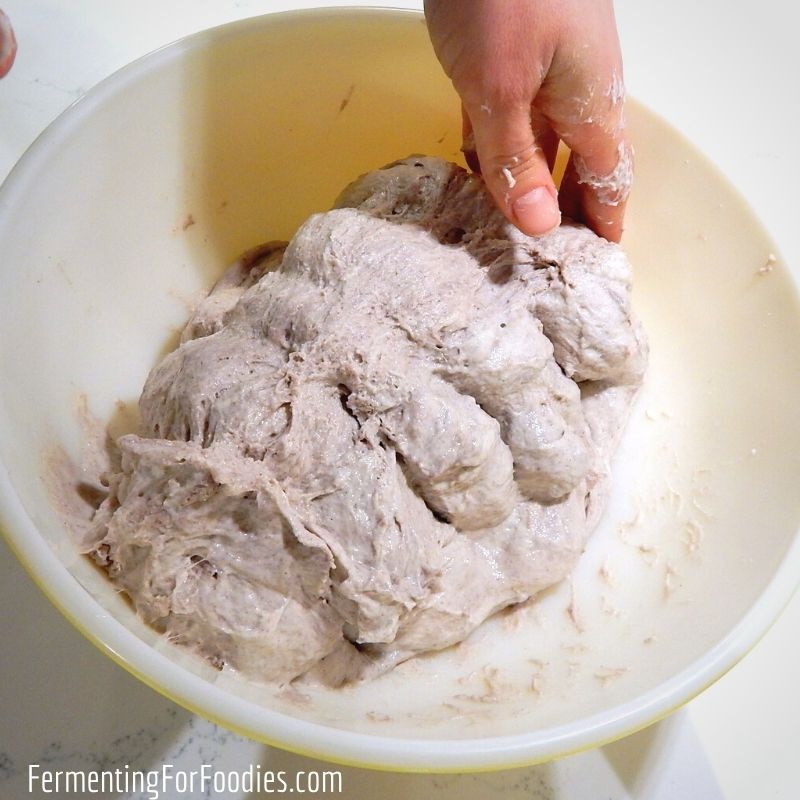
- Repeat this process until the dough is well mixed.
4. Kneading or Folding Dough
Kneading
The bubbles formed by sourdough yeast are too delicate to withstand the usual process of kneading and punching down.
However, kneading is the best way to make the nice, even crumb found in most sandwich and toasting bread.
To knead sourdough bread, include a bit of commercial yeast in the recipe. Then the sourdough starter can provide all the delicious flavor, while the added yeast will provide the loft. If your recipe doesn’t include any additional yeast, feel free to add up to 1 tsp of dried yeast in a regular-sized loaf of bread.
Folding
Folding is a technique that develops the gluten structure and brings air into the dough without breaking the delicate sourdough yeast bubbles. The result is an artisan-style bread with large air pockets and a chewy texture.
Here’s how to fold sourdough bread.
- Thoroughly wet your hands so that the dough doesn’t stick to you.
- Grab a handful of dough and gently pull it to the side.
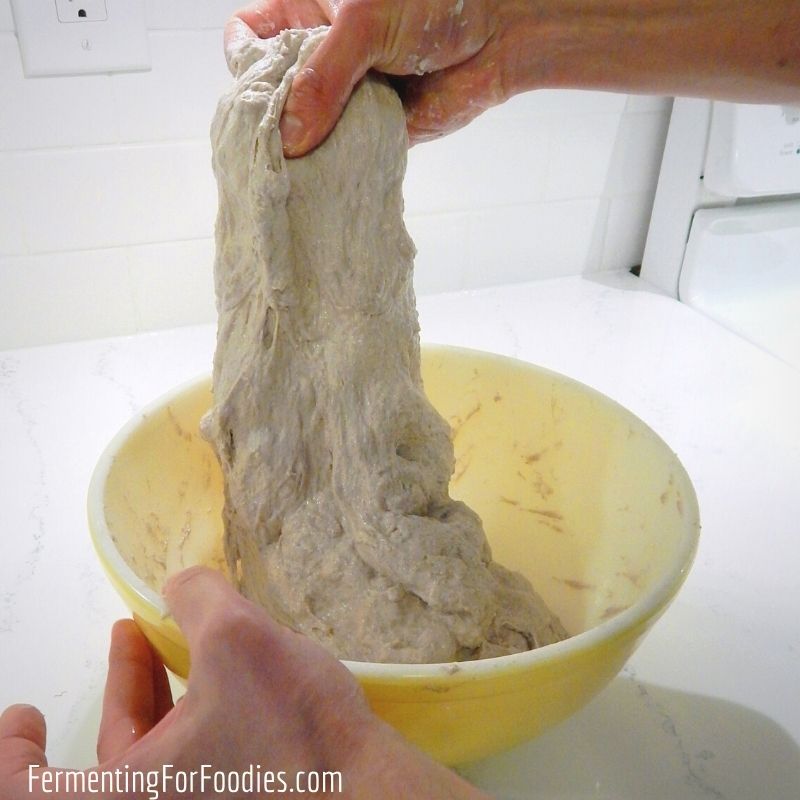
- Then fold it over top of itself.
- Rotate the bowl 90 degrees and fold the dough again. Rotate the bowl and fold the dough for the third time.
- Allow the dough to rest for at least 30 minutes and up to several hours. Then repeat the folding process again. Try to fold the dough 2 to 4 times during a 12 hours rise.
- The exact timing of the folding doesn’t really matter, so feel free to head off to work for 8 hours, then fold the dough when you get home.
- The dough will change from being sticky to a firm ball by the time it’s done rising.
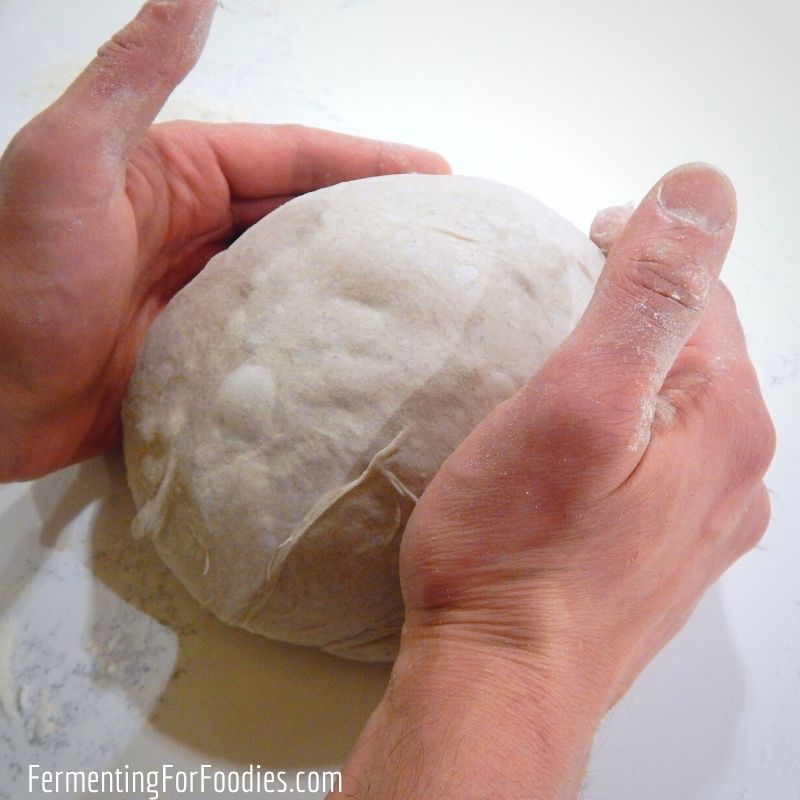
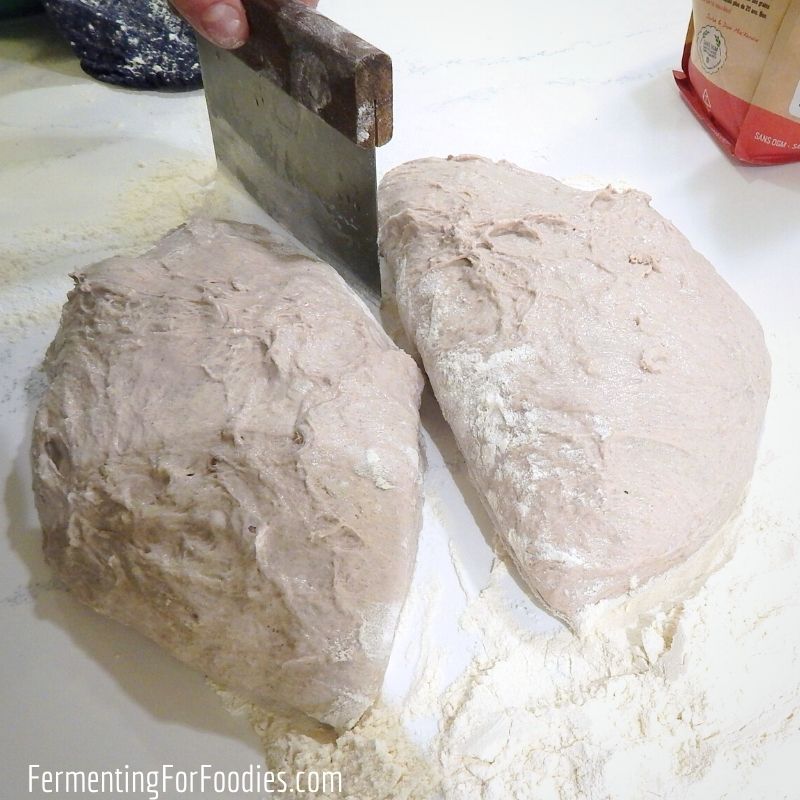
5. How to Shape Sourdough Loaves
Sourdough loaves need to be carefully shaped to prevent having the delicate bubbles broken.
Here are the steps to forming a sourdough boule.
- After fermenting and folding for at least 12 hours, gently lay the dough on a well-floured counter and cut it into the number of loaves you’re planning to make.
- Gently coax the dough into a ball without ever kneading it or pressing down on it. The goal is to avoid breaking any of those delicate air bubbles that you have made. Brad does this by cupping the dough in both hands and slowly rolling it into shape.
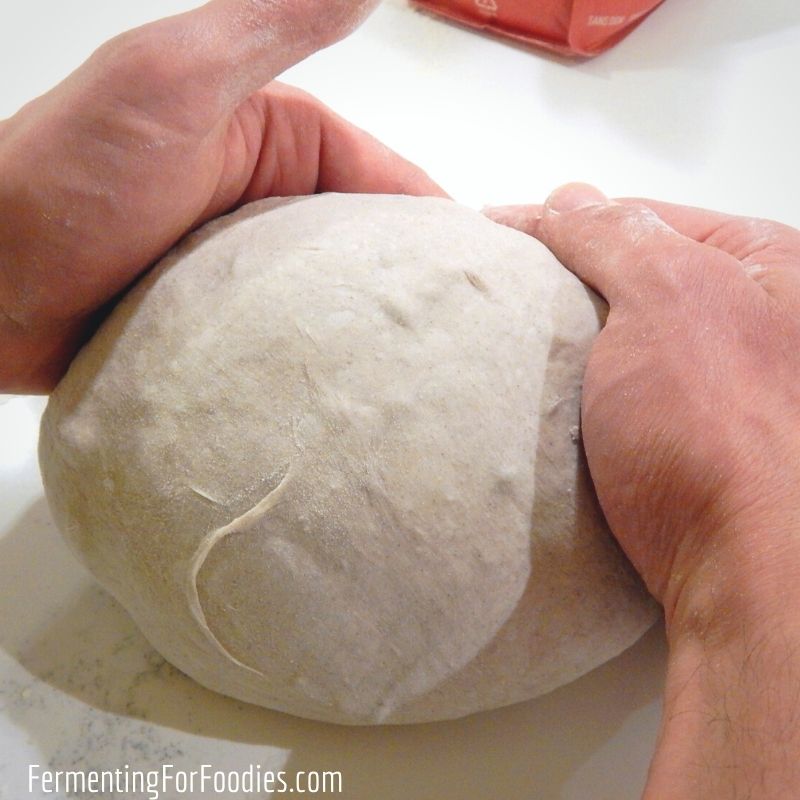
- After forming the dough, cover it and set it aside for a final rise. You can do this final rise on a counter, in a floured bowl, or in a banneton
- We often do this final rise in the refrigerator, which slows the fermentation down so that we can bake bread whenever it’s convenient. It also improves the flavor of the bread by giving the bacteria extra time to ferment.
6. Tips For Baking Sourdough
There are really only two tips for baking sourdough bread:
- Heat your oven as hot as it can go. Think of all those lovely wood-fired pizza ovens in Italy.
- Bake in a hot cast iron dutch oven. Just put it in the oven when you turn it on to preheat. Then bake with the lid on for the first 30 minutes. This will provide an even blast of heat and will keep the bread from crusting during the initial cooking. After 30 minutes, remove the lid so the bread can form a nice crust.
Now you’re ready for the recipes!
Thank you for these great tips!
I’d like to use kefir as my starter so I looked at the method here https://www.fermentingforfoodies.com/quick-and-easy-sourdough-starter/. In the step above that says “After 30 minutes it’s time to add in your sourdough culture, salt and most other ingredients.”” – should I be adding only the kefir or the kefir/flour combination that has been left for 24-72 hours from the other page?
Good question! You should be adding the kefir/flour combination. The cultured kefir/flour will act as a sourdough starter after 24 hours, but not really before that. Enjoy!
Hi! My first fold is still really wet. Should I add more flour or wait to see how it looks/feels after the 30 min is up? Thanks!
Are you following one of my recipes? Depending on the type of flour and hydration ratio, it could start out wet. If you are using wheat flour, then it will become drier after the 2nd and 3rd folds.
Hi I followed the recipe and was in the dough stage of overnight before cooking. It looked great before bed. I woke up,it was flat and runny. I have a two week old starter, that smelled perfect. I used whole grain wheat with unbleached flour in the beginning. I’m in Las Vegas area in winter. Can I add more flour and see if it helps, or toss it? Thanks.
Having a runny loaf definitely isn’t bad. I recommend putting a bit of flour on the counter and using it to form the loaf. Then place the loaf into either a banneton (or bowl lined with a floured tea towel) or the loaf pan. When you move the loaf out of the banneton, it will flatten as it bakes, but it will still be delicious!
Certain breads start out quite liquidy. Ciabatta, for example, is a very runny dough and is baked runny (hence its flat shape). Are you making my French sourdough loaf? If that’s the case, then next time, add a bit more flour. White flour holds more moisture than whole grain flour. So it might be because you used more whole grain than the recipe called for.
Good luck! Emillie
Thank you