This is a detailed, step-by-step guide to the beer-making process. It covers wholegrain brewing and brewing with a malt extract.
This post is part of a series of posts on the beer-making process. See Homebrewing 101 for detailed information on the equipment, ingredients, sanitation, and recipes.
Homebrewing is probably a lot less complicated than it seems. It only takes one batch to get the hang of it. To make things easy, I’ve broken down the brewing process into 7 simple steps.
I even got my husband, Brad, to agree to be recorded while making a batch of summer IPA. He’s an engineer, not a YouTuber, so he definitely earned that batch of beer! 🙂
1. Sanitize
Always start every brew day by sanitizing EVERYTHING. It’s the best way to avoid making skunky-tasting beer. You don’t need to sanitize any of the equipment before the boil (step 3), but after that, everything needs to be clean.
- Brew Day: Sanitize the carboys, airlocks, the yeast package, and the auto siphon.
- Racking: Sanitize everything again when it’s time to rack into clean jugs.
- Bottling: You also need to sanitize the auto-siphon, beer bottles, and caps.
2. Prepare the Wort
If you are making beer using only malt extract, skip right to step 3 because malt extract is added directly to the boiling pot.
However, I encourage you to try making wholegrain beer or brewing with a combination of whole grain and malt extract. Beers made with malt extract have that distinctly lackluster “homebrew” flavor.
Whole-grain beer tastes like a fancy microbrew and is definitely worth the effort.
There are 2 steps involved with preparing whole grain wort.
Heat the Mash
The goal of heating the mash is to keep the malted grain submerged in 150F /67C water for around 60 minutes. (The exact temperature and time will depend on the recipe). This activates the enzymes in the grains so that they convert the complex storage starches into simple sugars that feed the yeasts.
- The easiest way to get the malted grain to the right temperature is to heat water on the stove to about 170F / 77C.
- Add the grains and maintain the temperature at roughly 170F /77C. This can be done with a mash tun (like in the video below) by keeping the water and grains warm in a pot on the stove.
- Put on the lid and take an hour-long break. (Perfect for sampling some of your previous batch of beer).
Sparging
Sparging is the process of completely rinsing the malted grain to get out all of the wort.
- After the mash has rested for 60 minutes, it’s time to drain the wort.
If you’re using a mash tun, open the valve at the bottom of the mash tun, and drain all the wort into your boiling pot. (This assumes that your mash tun has a filter. If not, then you will have to follow a complicated process to get the grains to settle out. You can find instructions for Lautering here. Though really… I recommend making sure you have a filter.)
If you aren’t using a mash tun, pour your wort through a fine-mesh strainer or a brew bag into the boiling pot. - Heat the sparging water to 170F / 77C. Then pour the hot water through the grain and continue draining the wort into the boiling pot.
Here’s a video of Brad preparing the wort.
3. Boiling
Bring the wort to a boil. Depending on the recipe, the wort will boil for 60 to 90 minutes.
Hops and Irish moss are added to the boil as indicated by the recipe.
- Hops are added at several times throughout the boil to develop the flavor.
- Some people just add the hops right to their boiling pot, but I recommend using a mesh bag so that you don’t have to filter it out later.
- Irish moss is added during the last 20 minutes of the boil to clarify the beer.
4. Chilling The Wort
Cooling the wort is probably the trickiest part of homebrewing.
Once the wort has finished boiling, it needs to be chilled to around 70F / 21 C before adding the yeast. Don’t be tempted to add the yeast earlier or you may end up killing it!
It is also important to chill the wort relatively quickly (it takes me several hours) to prevent wild yeasts and bacteria from colonizing your beer and turning into something funky.
Here are three common ways to chill the wort:
- The best way to cool the wort is with a wort chiller. This copper pipe is submerged into the brew pot and cold tap water runs through the pipe, cooling the beer.
- If cold tap water is scarce where you live, the boiling pot can be submerged in a bathtub filled with ice.
- If you’re a Canadian brewing beer in the winter, just put the pot outside for a few hours. (This is what we usually do).
5. Pitching Yeast
Once the wort has cooled, remove some wort to calculate your original gravity with a hydrometer. (This step is only necessary if you want to know the final ABV).
Read the yeast package and follow the instructions. Our favorite yeast is activated before it is added to the wort. (It’s also not available online, because it needs to be refrigerated).
- To pitch the yeast, start by sanitizing the yeast package, the mixing spoon, and EVERYTHING that touches the beer after this point.
- Add the yeast to the chilled wort.
- Stir vigorously. The goal is to mix some oxygen into the wort for the yeast.
Here is a video of Brad setting up for the primary fermentation:
6. Fermentation
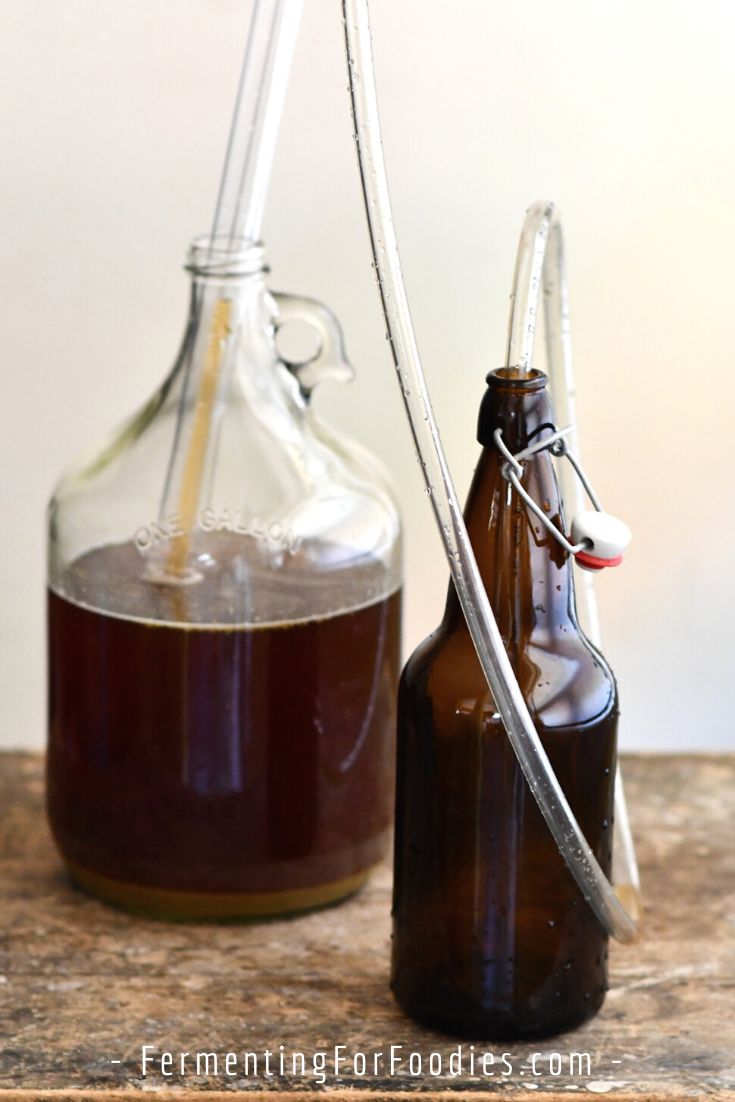
Using an auto-siphon, move the beer from the boiling pot into the carboys. Leave lots of headroom in your carboys, because the beer will bubble significantly during the fermentation process. We fill a 5-gallon carboy to the 4-gallon mark because we never leave enough headroom!
Cap the carboys with airlocks and store them somewhere dark and relatively cool (67F / 19C) for around 10-14 days.
The exact temperature range and length of time will depend on the strain of yeast, so follow the information on the yeast package.
Racking and dry hopping
If the recipe calls for dry hopping, then need to add hops to the beer after the vigorous primary fermentation has finished. This final addition of hops is for flavor and to act as a preservative. It will result in a deliciously hoppy beer.
Regardless, it’s a good idea to rack the beer into a clean carboy after 10 days to remove the spent yeast that will have collected on the bottom of the carboy.
If you are dry hopping, add in the hops at this point, then cap the jug with an airlock. Allow the beer to ferment for another week or two.
7. Bottling
Carbonating
The beer is fully finished after 2-4 weeks in the carboy. At that point, the yeast will have consumed most of the sugars and the beer will be flat. To carbonate the beer, extra sugar is added before bottling. This will feed the remaining yeasts and carbonate the bottles of beer.
You can do this by racking the beer back into a sanitized boiling pot, leaving behind any remaining sludge in the bottom of the carboys, and mixing dextrose into the whole batch of beer, before bottling. Alternatively, the dextrose can be evenly divided between the carboys.
The final specific gravity reading is taken at this point to calculate the ABV.
Bottling
Use plastic bottles, swing-top bottles, or capped beer bottles that are designed to handle carbonation. Decorative bottles aren’t necessarily able to handle the pressure of carbonated beer and may explode.
Using the auto-siphon, bottle the beer, leaving about 1.5 inches (3 cm) of headroom at the top. Cap your beer and store it in a cool, dark location for another 2-4 weeks. The beer is ready when it tastes good!
I recommend drinking homebrew in 3-4 months. The beer is shelf-stable. However, it’s also preservative-free, so don’t leave your precious homebrew to ferment for too long.
Here’s a video of Brad bottling the beer.
We aren’t video sorts of people, so I hope these are helpful! Good luck with your homebrew!
… [Trackback]
[…] Read More on that Topic: fermentingforfoodies.com/brewing-beer-home-basic-process/ […]