How To Make Milk Kefir
Want to make milk kefir? Here’s everything you need to know about how to make your own probiotic and delicious kefir. It is so much easier than yogurt!
- Prep Time: 5 minutes
- Total Time: 5 minutes
- Yield: 1 liter 1x
- Category: Beverage
- Method: Fermented
- Cuisine: Caucasus
- Diet: Vegetarian
Ingredients
Units
Scale
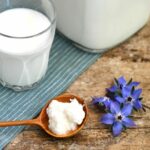
- 4 cups (1 L) of milk (see notes)
- 2 Tbsp of kefir grains (see the section above for details)
Instructions
- This basic recipe is perfect for making thick milk kefir. See the sections above for details on making smaller batches or keeping your kefir from over-culturing.
- Mix the milk and kefir grains in a glass jar or pitcher. Cover with a loose-fitting lid, cloth, or paper towel. You don’t want to use an air-tight lid as kefir will carbonate. Leave the container out at room temperature for a minimum of 4 hours and up to 24 hours depending on how strong you want the kefir to be. The longer you leave it the more sparkling and sour it will become. We like to culture for 6 to 8 hours.
- To slow down the fermentation, store the kefir in the fridge. When you are ready to enjoy your homemade milk kefir, remove the grains and place them in fresh milk for reculturing.
- Store the finished kefir in the fridge. It will continue to ferment, so you will end up with separated kefir if you don’t drink it within a few days. See the section above for more details on how to take care of your kefir grains and flavor your milk kefir.
Notes
- It’s fine to use cow’s milk, goat’s milk, or sheep’s milk. However, you will need to use a different recipe to make vegan kefir using coconut milk.
- My kefir grain usually floats after 8 hours of fermenting, so I simply scoop it out with a spoon. If you have the tiny kefir grains then you will need to pour your kefir through a strainer.
- If you have too many grains or you leave your kefir out on the counter too long you will end up curdling your milk. This is perfectly good to eat! Turn it into kefir cheese for a delicious and probiotic cheese spread.
Find it online: https://www.fermentingforfoodies.com/easy-homemade-milk-kefir/