


Whether you are looking for traditional sauerkraut, a delicious jar of pickles, or something more exotic, it’s easy to make fermented vegetables. Here is everything you need to know about how to ferment vegetables, along with links to recipes for everything from Avocados to Zucchini!

How to Ferment Vegetables
If you are new to fermenting, making Lacto-fermented vegetables is a great place to start! They are easy, reliable, and delicious! The perfect place to start for anyone interested in:
- Simple, no-cook, food preservation.
- Improving their gut health with probiotics.
- Adding flavor to their meals.
- Reducing weekday meal prep by preparing vegetables ahead of time.
Ready to ferment?! Here are 7 steps to success!
1. CLEANLINESS:
When fermenting, it’s always best to keep everything as clean as possible to avoid contamination. If you’re only fermenting your carrot sticks for a few days, then you probably are fine to simply pack them into a clean jar.
However, if you want to stash your fermented vegetables in your larder for several months, then you need to make sure the jar is sanitized. The easiest way to sanitize is to either run the jar through a hot cycle in your dishwasher or pour boiling water over the jar.
Want more details? Here’s a full post on how to sanitation for fermentation.
2. TEMPERATURE:
Vegetables prefer to ferment at around 65 F (18 C).
Don’t panic if you don’t have anywhere cool to stash your fermented vegetable. Expect them to ferment quickly at warmer temperatures, and use at least a 3% brine ratio.
3. DARKNESS:
Light encourages mold. The best place to store your fermenting veggies is in a kitchen cupboard, closet, or dark basement. Alternatively, you can wrap them in a tea towel to avoid light exposure.
4. STARTER Cultures:
Most field-grown vegetables have lactic acid bacteria on their skin. This is particularly true for cabbage, which is why cabbage ferments (like kimchi and sauerkraut) are so reliable for beginners.
However, there are times when you may want to use a starter culture. Starters are perfect for adding flavor or helping a ferment go quickly. They are necessary for sweet ferments, like bread and butter pickles or sweet chutney.
If you want more details, check out my post on when to use a vegetable starter.
5. SALT:
Not all fermented vegetables are salt-based. However, using a salt brine is the traditional way to preserve vegetables. This is because the right amount of salt will prevent mold, yeast, and bad bacteria from growing in your ferment.
- It doesn’t matter whether you use sea salt, pickling salt, or kosher salt. Just avoid iodized salt or table salt with anti-caking agents which will slow or stop the fermentation.
- I typically use a 2.2% brine, which is approximately 1 Tbsp. of salt per quart-sized jar. Here’s a handy brine calculator to help you figure out how much salt and water to use.
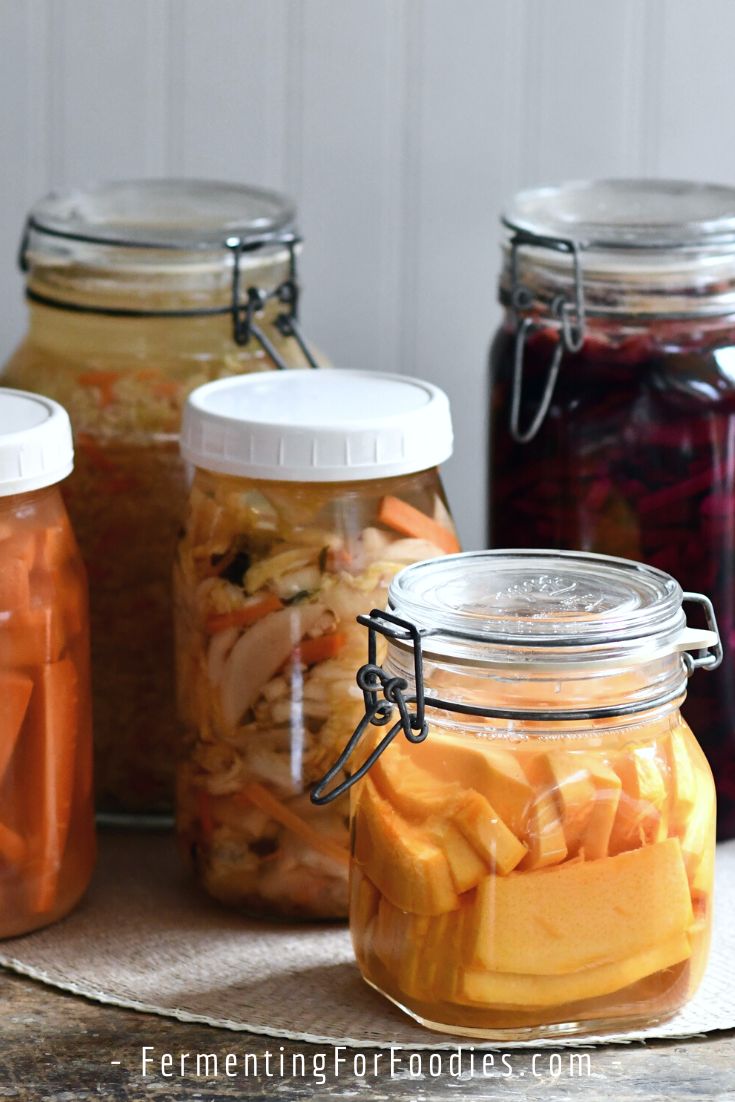
6. CONTAINERS:
If you are just starting out, there’s no need to buy fancy fermentation containers. Any glass jar with a weight to keep the vegetables below the liquid brine will work.
- A weight is necessary to keep everything under the brine. Exposure to air will degrade the vegetables and increase the risk of mold.
- Fermented vegetables will bubble and release CO2, so gas needs to be able to escape from the jar or risk an explosion.
- I find that a small jam jar makes a good weight for a wide-mouth mason jar. Loo
- If you plan on doing a lot of fermenting I recommend buying a fido jar or a mason jar with an airlock. They are also the best option for any ferment that is going to be stashed in your cupboard for longer than one week.
- Want more details? Here’s a whole post on jar for fermenting.
7. When Is It Ready?
If it’s your first time fermenting, you may be wondering, when is your ferment ready to eat?
- Always follow the recipe. Some ferments are best eaten after 24 hours, others can last for months in a cool, dark closet. Here’s a post on storing your fermented vegetables.
- Vegetable ferments may be bubbly. Sometimes they will be a bit cloudy or have powdery sediment settling in the jar. This is perfectly fine.
- Fermented vegetables should always smell and taste good. If they smell funny or taste off, then don’t eat them. They may be a bit tangy, sour, or sparkly, but they shouldn’t taste bad.
- The biggest risk for fermented vegetables is mold. Here’s how to tell the difference between mold and kahm yeast.
- If you have any other concerns, I’ve written a whole post on how to solve common problems with vegetable ferments.
Favorite Recipes
Here are some of my favorite vegetable ferments. For recipes for everything from avocadoes to zucchini check out my fermented vegetable recipes.
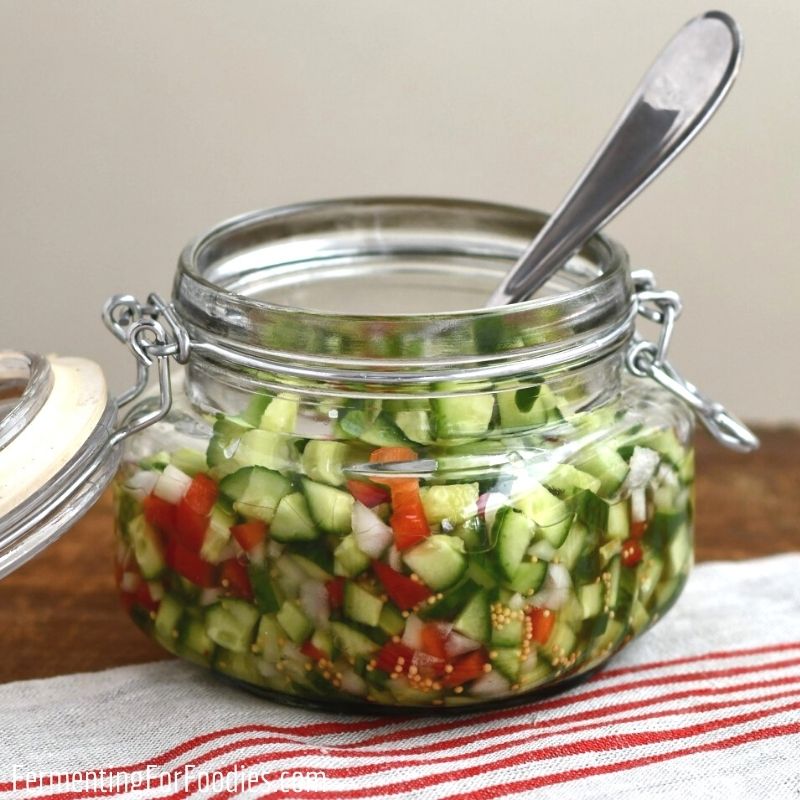
Snacking Vegetable Sticks
Snacking vegetables are a great way to get started. They are quick to put together, only take a few days to make, and you end up with a delicious snack! Try making Carrot Sticks, or mixed Picnic Basket Vegetables. Personally, I LOVE the Italian-style fermented Giardiniera.

Pickled Vegetables
Fermented vegetable pickles are a traditional way of preserving food. While old-fashioned pickles are always popular, the list of vegetables that you can turn into fermented pickles is endless. Here are a few of my favorites: Beets, Cocktail Onions, Garlic Scapes, and deliciously pink Turnip Pickles.
Relish and Other Condiments
If you want to add more probiotics to your diet why not throw a little culture into your Guacamole or Salsa? Try a salty Cucumber Relish or a sweet Zucchini Relish.
Traditional Cabbage Ferments
As I mentioned above, cabbage has its own lactic bacterial culture, which is why it is so popular to ferment! Curtido is South American fermented cabbage and onions, which is delicious on pupusas. Koreans eat kimchi at almost every meal. If you are new at fermenting I recommend making sauerkraut because it is such an easy and reliable ferment for first-timers.
If you are looking for some new and exciting ways to get sauerkraut into your diet here are some ideas.
Hi
Thanks for the information.
I have a lot of apples left over from last autumn’s harvest and I would like to juice them and and use the mother from a previous batch to inoculate the juice. Problem is, it’s summer now and everywhere is pretty hot. Would it just speed things up if the temperature is higher. I have a choice of a coolroom that’s like a fridge, or temperatures that vary from mid teens to about 40 degrees C.
I think I’ll go with the cool option to begin with, but let me know if you think otherwise
Regards
Diana
Hum… I live somewhere where summer is only around 22 C, so that is never a problem I’ve had to worry about. 🙂 My thoughts are that the heat will favour the yeast over the bacteria strains in your apple cider. As well, it will ferment faster at the warmer temperature. I think you should probably do the first few days at 40C, just to get a really vigorous ferment going, then move it to the cold room for finishing. Just make sure it’s dark for the first week of the ferment or you might get kham yeast. (Not a problem, but not desirable either: https://www.fermentingforfoodies.com/archives/1154)