

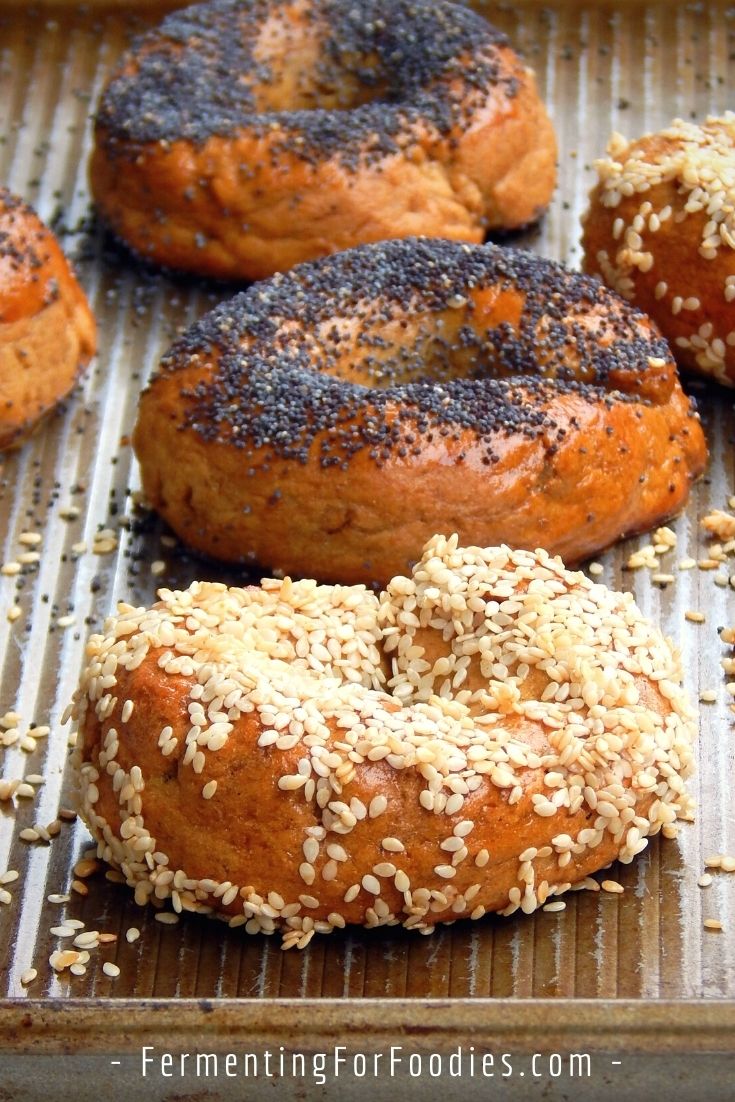
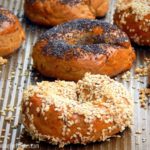
Can you imagine biting into a chewy and delicious gluten-free sourdough bagel? This traditional, boiled bagel recipe is satisfyingly flavorful and chewy.
Gluten-Free Sourdough
Bagels were something I really missed when I became gluten-free. Traditional bagels are so chewy and flavorful that it was hard to find a gluten-free version that would compare.
However, the secret to these delicious gluten-free bagels is the sourdough starter! These gluten-free bagels are perfect toasted with butter or served with a schmear of homemade cream cheese.
- Gluten-free bread usually relies on flavorless starches and binders for stickiness.
- Sourdough starter improves the texture of gluten-free baked goods without the addition of starches. It breaks down gluten-free grains so they become stickier.
- Sourdough also adds richness and flavor.
Don’t worry if you’re new to gluten-free sourdough baking. It takes about 5 days to catch a sourdough starter in your favorite gluten-free flour. Alternatively, you can always make a quick starter with milk kefir or kombucha!
Bagel toppings
Toppings will stick to freshly boiled gluten-free sourdough bagels. You don’t need to add an egg wash or anything like that. Just sprinkle on the toppings as soon as they come out of the water.
Here are a few delicious options:
- Plain
- Poppyseed
- Sesame seed
- Onion: Sprinkle with finely minced fresh onion.
- Rosemary garlic: Top with minced fresh garlic and rosemary.
- Everything: Use a mixture of 1 Tbsp poppy seeds, 1 Tbsp sesame seeds, 1 tsp dried minced onion and 1 tsp dried minced garlic. Or buy a ready-made everything mix.
- Cinnamon: Mix 2 Tbsp sugar with 2 tsp of cinnamon
- Cheese: Asiago cheese is traditional, but any hard cheese will work. Sprinkle 1 Tbsp of grated cheese over each bagel.
Gluten-Free Sourdough Bagels
This deliciously chewy, gluten-free bagel uses sourdough for flavor and texture. This recipe follows the traditional boiled bagel method and comes with 8 different flavor options (see section above).
- Prep Time: 2 hours
- Cook Time: 45 minutes
- Total Time: 2 hours 45 minutes
- Yield: 8 bagels 1x
- Category: Bread
- Method: boiled
- Cuisine: Jewish
- Diet: Gluten Free
Ingredients
Dough Ingredients
- 1 cup active sourdough starter
- 1/4 cup of water
- 2 tsp instant bread yeast (optional, but provides an extra boost)
- 1 Tbsp molasses
- 2 tsp sugar
- 2 eggs
- 2 3/4 to 3 1/4 cups gluten-free bread flour mix
- 1 1/2 tsp salt
For Boiling
- 1 Tbsp baking soda or 1/3 cup of honey (see notes for details)
- 2 Tbsp toppings (optional, see below)
Instructions
- Mix the sourdough starter, water, yeast, molasses, and sugar in a large bowl. Whisk in the eggs. Then slowly stir in the flour and salt. The dough will be quite stiff, so kneed to get everything combined. Lightly oil your hands to prevent the dough from sticking to you while you kneed. The exact amount of flour will depend on your flour blend, so add more, if required, to form a nice stiff dough.
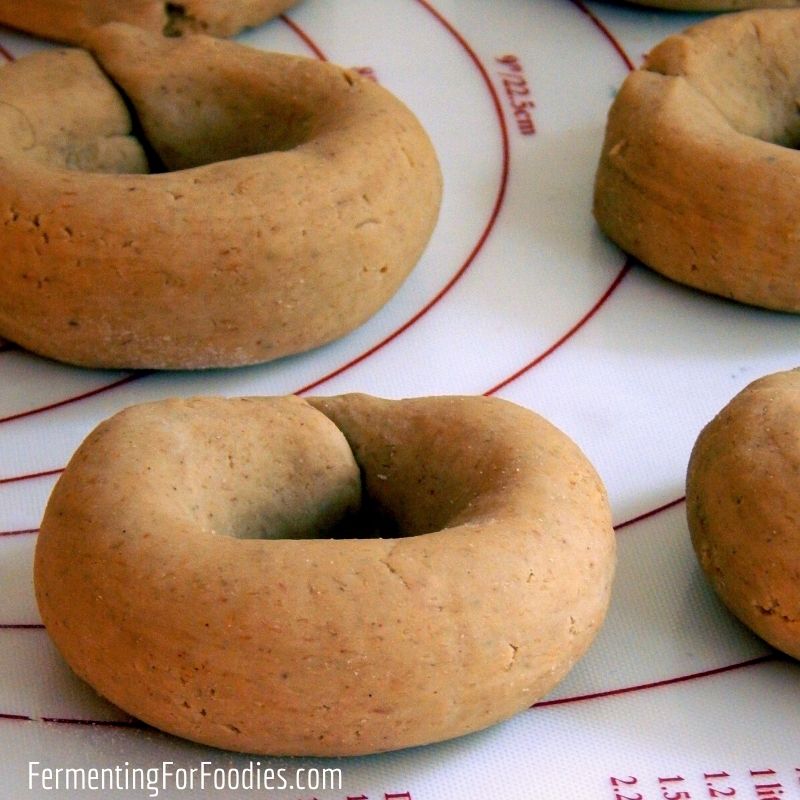
- Divide the dough into 8 equal pieces. Working with 1 piece of dough at a time, form it into a bagel shape. Be sure that the ends overlap and are pinched together. Line a baking sheet with parchment paper. Set the bagels on the baking sheet with at least 1 inch between each bagel to allow room for rising. Leave the bagels somewhere warm to rise for 2-4 hours.
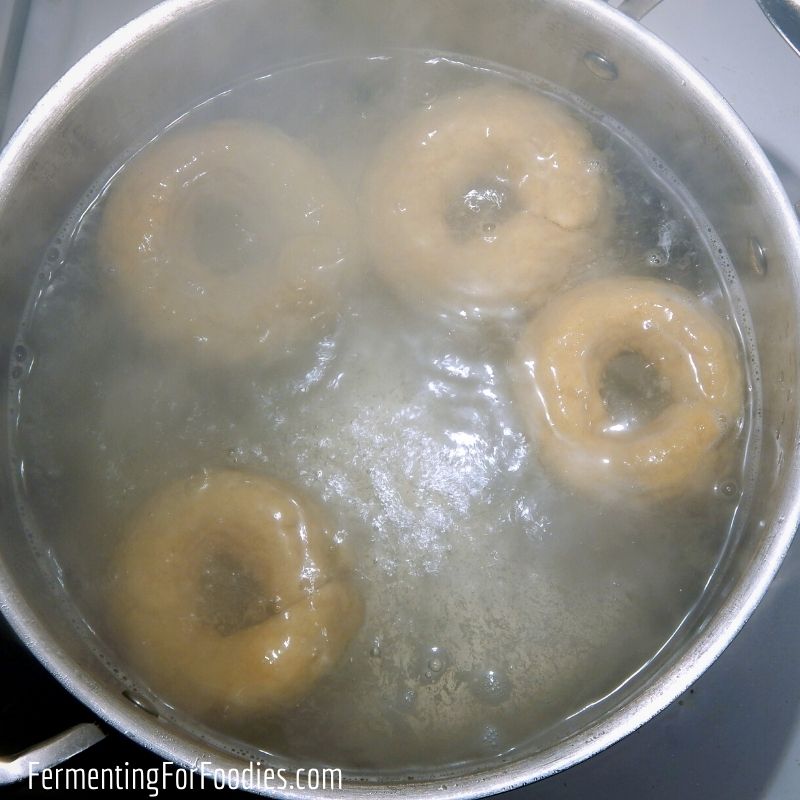
- When you’re ready to bake the bagels, start by preheating the oven to 425F. Then bring 4 liters of water to boil in a large pot. Either add honey or baking soda to the water (see notes for more details).
- Working with 1 bagel at a time, place the bagel in boiling water and cook for 20 seconds, flipping them over halfway through cooking. Using a slotted spoon, return the bagels to the baking sheet. Sprinkle on the toppings before the bagels cool. (See section above for topping options).
- Once all the bagels are boiled, bake them at 425 F for 15 minutes. Reduce the oven temperature to 350 F degrees, rotate the cookie sheet, and continue to bake for another 20 minutes, until the bagels are golden brown.
- Remove bagels from the oven and allow them to cool for at least 20 minutes before serving. Use within 3 days, or slice in half and freeze them in a zip-top bag to keep them fresh.
Notes
- Feel free to use my recipe to make your own bread flour or use your favorite store-bought mix. Just note that different flours have different hydration ratios, so be prepared to adjust the amount of flour, as needed.
- Adding baking soda or honey to the boiling water causes the bagels to brown nicely while baking. Baking soda gives the bagel a pretzel-like flavor. Honey adds a sweet caramelization.
- The nutritional information is based on using Nutri Flour GF Blend.
Nutrition
- Serving Size: 1 bagel
- Calories: 222
- Sugar: 2.5g
- Sodium: 462mg
- Fat: 1.4g
- Saturated Fat: 0.6g
- Carbohydrates: 49.5g
- Fiber: 6g
- Protein: 5.9g
- Cholesterol: 41mg
they sell psyllium husk at Ingredients in bulk 🙂
I noticed that the last time I was there. I’ll post my psyllium husk GF sourdough soon. Just finished up with my cheeses. 🙂
What would you recommend as an almond flour substitute for the
nut allergic?
I would replace it with any whole grain flour. You may need to add a bit more liquid because almond flour doesn’t absorb as much liquid as other flours. Let me know how it goes!
Can I substitute an egg for a flax egg?
The recipe calls for an egg, however, if you want to use a flax egg I recommend adding 2 tsp xanthan gum. The bagels are boiled, and you really want to make sure that it keeps it’s form.
I had doubts that these would hold up in the toaster, but they did great!
Thanks! My kids literally eat these for breakfast EVERYDAY.
Looks so delicious and perfect for weekend brunch!
In the beginning you suggest psyllium husk is key to all of your gf baking but I don’t see any psyllium husk in your bagel recipe. I’m confused! Was hoping to make these today, but unclear if I should be adding the psyllium husk or not?!
I actually made this recipe several times since my kids have been stuck at home with COVID school closures. They both really love making bagels. I admit to playing around and refining the recipe. 🙂 I just can’t help it! Anyways, the psyllium husk seemed to give the bagels a crumbly texture, less chewy than a traditional bagel. So I took it out. Clearly I need to read over the text as well! We really love the current recipe, and I won’t be changing it again.
I was wondering the same thing. Thank you to the commenter for asking and you for answering! Rising on my countertop now- can’t wait to taste them!
I added 1tbsp psyllium husk. Would that be why I had to add a lot more water? Just starting to figure out gf baking
Yes! Psyllium husk absorbs a lot of water. 1 tbsp of psyllium is equal to about 1/4 cup of flour. I have played around with this recipe a lot, alternately adding or taking away psyllium husk. The current version is my favourite as I like the chewiness of just flour. Adding a bit of psyllium husk will make a softer bagel. Enjoy!
Can you sub something for the molasses?
Molasses is for flavour. Feel free to skip it. 🙂
Can these be left to rise overnight? Trying to time them for bday kid’s breakfast without being up at 4AM.
I haven’t tried a long ferment, however, it should be fine. Just put them in the fridge (if you have room) it will slow it down and prevent the egg from going off.
Hi- can I make you GF bread flour without a bean flour? If so, should I substitute another flour & if so which one?
You can just skip the bean flour. It’s mostly there for protein and flavour. The flour/starch ratio is the most important for baking bread (and bagels!)
Do u think I could use bobs redmill 1to1 for my flour?
Yes! I haven’t used it for my bagels, but I have used it for bread in the past, and it’s a pretty good product. Cheers!
First time making them- they completely disintegrated in the water bath. Any ideas why?
Wow! I have no idea. Did you skip any of the ingredients? The eggs are particularly important for the boiling portion. I doubt it has to do with how you formed them, as I generally let my kids form the bagels and they make all sorts of crazy shapes… most often the letters of their name. 🙂
Can you leave out the sugar in the bagels?
Yes, it’s for the flavour and feeding the yeast. However, it’s not necessary. Enjoy!
Hi! Can I sub instant dried yeast for bread yeast and erythritol for sugar?
Yes, however, I would skip the sugar all together instead of using a substitute, since it’s partly to feed the yeast.
why do you need yeast? isn’t that the point of the starter?
You don’t need yeast. But I find GF breads can use all the extra help they can get. 🙂 The sourdough adds flavour, structure and some rise. The yeast just adds more rise. If you want to skip the yeast, just rise your bagels for 12-24 hours before boiling. Enjoy!
Why is it you use both sourdough start and dry yeast? Have you tried it with only the sourdough and maybe baking soda?
You could add baking soda for a bit of extra lift. I personally like the yeasty flavour in the bagels. You can also just use a straight sourdough starter and leave it to rise for 12 hours. However, I usually avoid doing long rises when there’s egg in the dough. Adding a bit of yeast just speeds up the rise. Feel free to try a bit of baking soda in the dough, around 1 tsp should work. You’ll want to reduce the salt to 3/4 tsp to compensate. Enjoy!
Hi – my first attempt didn’t work – mixture was incredibly dry and bagels then never really rose. This recipe has so much less liquid in it than other GF bread recipes I make. Wonder what I am doing wrong as other people seem to have great success! The bagels look and smell fab, just would need a chainsaw to eat them…
This isn’t like other GF bread recipes, because it needs to be stable enough to boil. My other bread recipes are all baked in a loaf tin or don’t need too much manipulation, so they are moister.
This really is one of our favourite recipes. I have a few ideas that might help you (if you choose to try it again).
1. Only add as much flour as needed to make a kneadable dough. It shouldn’t be so dry that it is crumbly. The exact amount will depend on the brand of flour you are using. GF flours and starches all absorb different amounts of liquid.
2. Did the bagels rise properly? They might not if your home is cool or if your yeast is expired (something that happened to me recently!)
3. Maybe bake for slightly less time or reduce the heat.
Cheers! Emillie