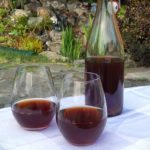
Homemade Plum Wine
Plum wine is earthy, rich, and smooth. It is delicious as an after-dinner wine or served chilled as an aperitif. It’s also a great base for mulled wine.
- Prep Time: 30 minutes
- Total Time: 30 minutes
- Yield: 3-4 bottles 1x
- Category: Alcohol
- Method: Fermentation
- Diet: Vegetarian
Ingredients
Units
Scale
- 5 lbs of ripe plums (no moldy ones)
- 3 lbs of sugar
- 16 cups of filtered water (chlorine-free)
- 1 teaspoon of fresh lemon juice (not bottled)
- 1 packet champagne yeast
Instructions
- Throughout the wine-making process, it is important to sanitize EVERYTHING that comes into contact with the plums. This is the best way to ensure the wine tastes good and ages well. Here’s a post on sanitation if you need more details.
- Wash the plums, remove the stems, and put them in a large pot. There’s no need to remove the pits, as they’ll be left behind when you filter out the solids. Use a potato masher to roughly break the skins.
- Bring the water to a boil. Then pour the boiling water over the plums. You can do this in batches with an electric kettle. The boiling water is to help kill off any mold or bacteria that might be on the skin of the plums. Put a lid on the pot and stash it in a quiet corner of your house to cool.
- After 24 hours, add the lemon juice and sugar to the plums and give them a good stir. Follow the instructions on the yeast package (mine involves rehydrating before use), then stir the yeast into the plums. Give everything another good stir after one hour to make sure it is well mixed. If you want to calculate the alcohol levels, remove some of the liquid at this point to measure the specific gravity.
- Cover the pot and leave it somewhere warm to ferment for 4-6 days. Give the mixture a good stir with a sanitized spoon once or twice a day.
- After the initial ferment, filter out the solids and move the liquid to your carboys. It’s better to leave some of the liquid behind in the solids than to have solids in your carboys. I usually use a siphon to get out most of the liquid. Then I strain the rest through a mesh brewing bag and bottle it right away for a bit of plum cider*. It carbonates very quickly, so stash it in the fridge right away and use a bottle that can handle the buildup of carbonation. It should be carbonated and ready to drink after 2-3 days in the fridge.
- Top the carboys with an airlock and leave them to ferment somewhere dark for 2 weeks. The back of a closet or the basement are good options.
- After 2 weeks, rack the wine into a clean jug for another round of fermentation. (This is to remove the spent yeast, which doesn’t taste good. Skipping this step will result in a not-so-tasty wine.)
- After two months bottle the wine. The wine needs to age for at least 10 months to develop a nice mellow flavor. I’m often tempted to sample it early, but it’s always a disappointment.
Notes
- *I realize that cider is technically made out of apples. But bottling the young plum wine results in a lower alcohol, sparkling beverage that is pretty much cider.
- This plum wine recipe does not use sulfur dioxide to curb fermentation. So it is not a sweet wine and the alcohol levels range between 12-15% (depending on the sugar level of your plums). It tastes a bit more like brandy than wine though, unlike brandy, it is not distilled.
- If you are using coarse or unrefined sugar, you may want to dissolve it in boiling water before adding it to the plums. Just reserve 5 cups of water from the initial batch to help dissolve the sugar. If you are using regular, refined sugar, it won’t have any problem dissolving.
Find it online: https://www.fermentingforfoodies.com/green-gage-plum-wine/
