
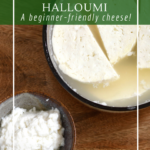
Halloumi is one of my favorite types of cheese. This traditional cheese comes from Cypress and is brined after pressing, similar to feta. The result is a firm, low-acid cheese, which won’t melt when grilled or fried. Here’s how to make halloumi cheese in your own kitchen!
Why Make Fresh Cheese?
While I occasionally dabble in the world of hard cheese, I prefer making fresh cheese.
- Though clean is always best, you can be a bit more relaxed about sanitation with fresh cheeses.
- The payoff is great! A gallon of milk turns into about 4 cups of halloumi cheese.
- You don’t have to wait 6 months for the cheese to age and finish!
How to Serve Halloumi Cheese
Halloumi is quite different from typical cheeses. Like feta, it won’t melt. However, it’s also not crumbly. Here are a few of our favorite ways to serve halloumi.
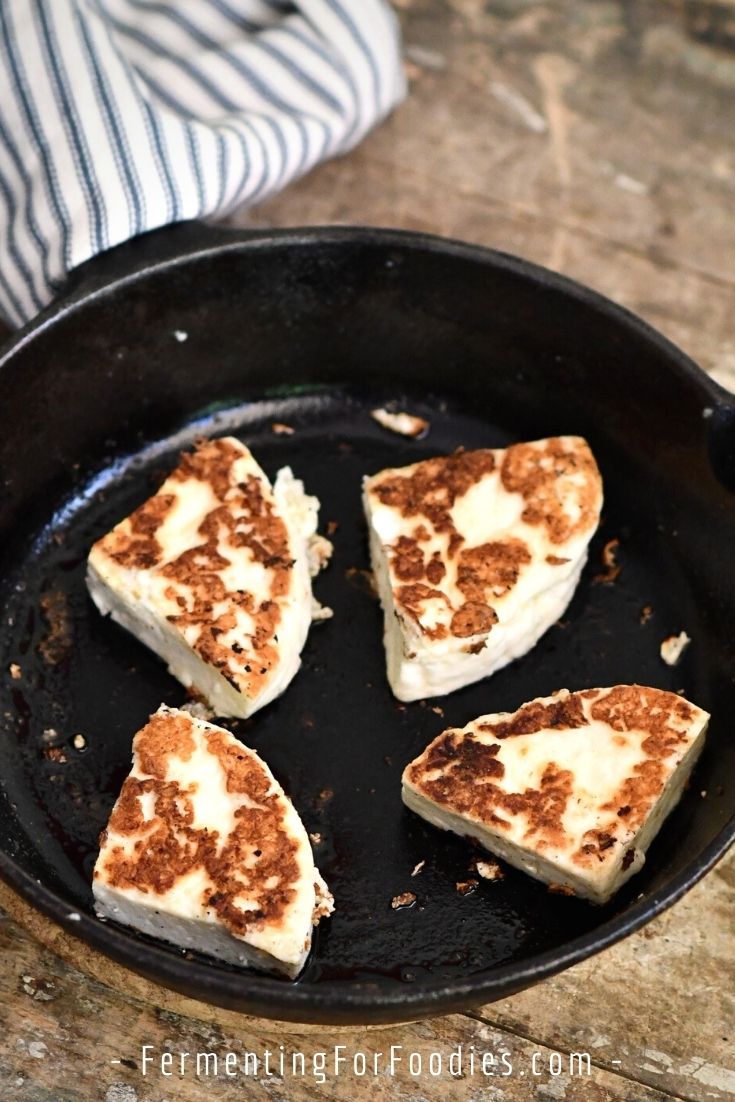
- Barbecue: It holds up to grilling, so baste it with a bit of olive oil and grill for a vegetarian meat alternative.
- Salads: Sauteed halloumi is delicious in salads. Try this recipe for a hearty lentil and broccoli salad.
- Pan-Fried: Pan-fried halloumi is delicious on sautéed vegetables, rice, or pasta. I especially enjoy this recipe for zaalouk.
Cheesemaking Steps For Beginners
Halloumi cheese isn’t as simple as cream cheese or feta. However, it’s perfect for new cheesemakers to learn all of the necessary steps.
Expect to spend about 4.5 hours from start to finish. That doesn’t mean you’re in the kitchen the whole time, but you need to be nearby so you can monitor everything. (Hurrah for working from home!)
Here are the basic steps involved with making halloumi. I’ve included links to pages that provide a much more detailed explanation for each of these steps. I recommend reading through them if you’re new to cheesemaking.
- Set the curd with rennet. (30 minutes)
- Cut the curd into 1-inch squares. Then cook the curd by slowly raising the temperature. Stir every 5 minutes to prevent the curds from settling on the bottom of the pot. (1 hour)
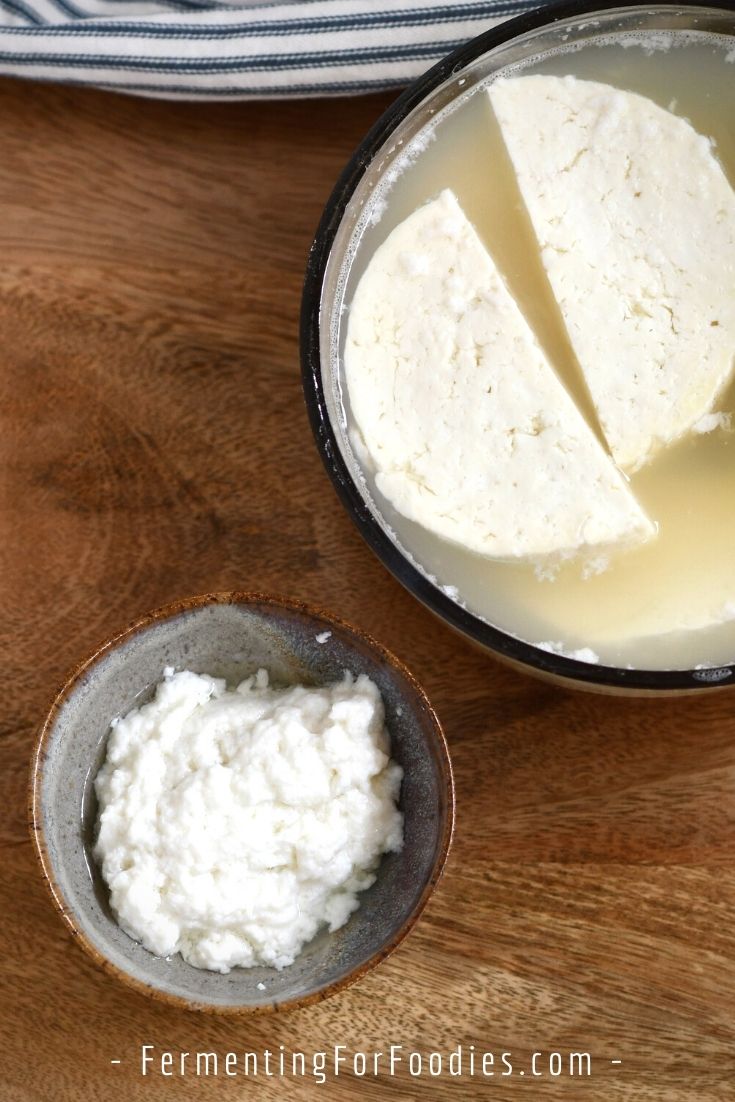
- Drain the whey into a large bowl, catching the curds in a cheesecloth-lined strainer. You want to keep the whey for poaching. (30 minutes)
- Press the cheese into a solid block. (1 hour)
- Remove the cheese from the form, slice it, then poach it in salted whey. The video below shows when the whey is hot enough for poaching. It starts to form curds. This is whey ricotta and it is absolutely divine. (1 hour)
- Store the halloumi in salted brine.
How To Make Halloumi Cheese
Learn how to make halloumi cheese at home! It’s a delicious fresh cheese that is perfect for salads, frying, and grilling. See the section above for some serving suggestions.
- Prep Time: 1 hour 30 minutes
- Cook Time: 2 hours 30 minutes
- Total Time: 4 hours
- Yield: 1.5 lbs of cheese 1x
- Category: Cheese
- Cuisine: Cyprus
- Diet: Vegetarian
Ingredients
- 1 gallon (4L) whole milk (goat and sheep are traditional, but you can use cow dairy)
- 1/4 tsp calcium chloride stirred into 1/4 cup of water
- Rennet (enough to set 1 gallon, follow the instructions on the packaging) stirred in 1/4 cup of water
- 1 Tbsp salt for poaching the curds
- 2 Tbsp salt for brining the cheese
Instructions
- Heat the milk to 86F. Stir in calcium chloride, fully mixing in. Add the rennet, fully mixing in with up and down strokes for 2 minutes. Keep the mixture at 86F until the curd has formed (30-45 minutes).
- Cut the curd into roughly 1-inch cubes. Allow the curds to settle for 5 minutes. Then slowly raise the temperature to 104F, raising it to 2F and gently stirring every 5 minutes. Heat the curds for a total of 1 hour (including the time to raise the temperature).
- Drain the curds into a cheesecloth-lined strainer with a bowl underneath to catch the whey. Save the whey for poaching.
- Leave the curds to drain for about 30 min, then either hang the cheese to further drain the whey or press it in a mold for 1 hour.
- After an hour heat the whey to 195F. At this point, you will get a bit of fresh ricotta floating on the top of the pot. Scoop it out with a slotted spoon and save it. (It’s amazingly delicious!)
- Add 1 Tablespoon of salt to the pot of whey. Remove the halloumi cheese from the press and slice it into 4-5 large slices. Put the cheese into the salted whey and keep it at around 180F for 1 hour of poaching.
- After poaching, make a brine of 2 Tbsp salt and 2 cups of water. Put the cheese into the brine and top with whey to fully cover the cheese (you will need at least 2 cups of whey). Allow Halloumi to brine in the fridge for at least 2 days or up to 2 months (see notes).
Notes
- Halloumi can be brined in a cool room (18C) or the fridge.
- Halloumi is traditionally made just with rennet; however, raw milk would already have a bacterial culture to provide some flavor. If you’re using store-bought milk, then I recommend kefir culturing the milk for about 6 hours before making the cheese. You don’t want the milk to be very acidic because this is not an acid cheese, but using slightly cultured milk will improve the flavor.
- Please read up on the detailed processes involved with cheesemaking if you are uncertain about any of the steps in this recipe.
is hallumi cheese classed as prefermented and how so?
Halloumi doesn’t need to be prefermented, however it wouldn’t have much flavour. I used milk kefir grains to give mine a “flora”. Instructions are written up in the notes below the recipe.
It is my understanding that traditional halloumi has been minted
when and at what stage you recommend I add some.
I would add mint after you’ve made the cheese as a marinade (with lemon juice & olive oil). Enjoy!
Is this hard to make? Could my kids help make this cheese?
I haven’t tried making cheese with my kids, mainly because they lack patience in the kitchen, and cheese takes patience. But it would be a good activity for a rainy day!
Halloumi cheese is Cypriot. Not Greek nor Turkish.
Thanks for letting me know!
Why does halloumi need to be poached?
Poaching firms up the cheese and draws out more whey. Most (all?) firm cheeses involved heating the curds. Enjoy!
I made this. First time i tried soft cheese and it turned out good. Thanks.
Hurrah! It’s always fun to have homemade cheese. Enjoy!
Thanks.
made this today for the first time using my giats milk , and it was amazing , the feta was also lovely ..so creamy …. thank you and look forward to making many more
Hurrah! I LOVE making feta. It is so satisfying. 🙂