

Learn how to make cottage cheese from cultured buttermilk. Instead of using rennet, buttermilk culture provides the necessary acidity to set the curd. It also gives this cheese its unique flavor.
Some recipes for cottage cheese use white vinegar or lemon juice to clabber the milk. However, they are actually making paneer and/or ricotta. The resulting cheese is flavorless. This is why paneer and ricotta are usually accompanied by flavorful sauces.
A Recipe for Beginners
I’ll admit that cheesemaking is not the easiest activity. Like baking bread, brewing wine, or making a soufflé, it requires a bit of skill and precision.
If you’re an absolute beginner, I recommend starting with paneer or yogurt cheese. However, if you’re up for trying something new, homemade cottage cheese is pretty easy. In fact, it was the first type of cheese that I ever made!
- The only equipment needed is a cooking thermometer and butter muslin. Typical cheesecloth doesn’t have a fine enough weave. However, if you can’t find butter muslin, just use 3 layers of cheesecloth instead.
- Cultured buttermilk sets the curd, so you don’t need to worry about finding culture.
- The culture is set at room temperature. So there’s no need to heat the milk to set the curd.
Advanced steps
Following the recipe will result in a delicious cheese with a creamy texture. However the curds will be smaller than you’re used to, and they’ll also be softer. Here are a few extra steps that you can do to improve the structure of the curd. Just doing one of them will help improve the curd, but use all three for a large curd cheese.
- Calcium Chloride: Mix 1/8 tsp of food grade calcium chloride in 1/4 cup of water, then mix it into the milk right before adding the buttermilk. This improves the yield when using homogenized milk.
- Rennet: Setting the curd with rennet will result in larger curds. Mix 1/4 tsp of liquid rennet (or 1/4 tablet) in 1/4 cup of water. Mix it into the milk right after adding the culture. So it’s the last thing you mix in before setting the milk. The curd will set more quickly with rennet so look at your cheese after 4 to 8 hours.
- Cooking The Curds: Cooking the curds results in firmer curds. Instead of keeping the curds at 100 F (38 C) slowly increase the temperature to 110 F (43 C). You want to increase the temperature every time you stir, about 1 degree every 5 minutes. Then maintain the curds at 110 F for 20 minutes.

Three ways to Finish Cottage Cheese
Once you’ve drained the whey, there are three options for finishing the cheese.
Dry Curd Cottage Cheese
After the whey is drained, the resulting cheese is quite dry and crumbly. This is called dry curd cottage cheese and it is very low fat and low lactose. So it is a good option for anyone who is lactose intolerant.
The best way to use dry curd cottage cheese is for cooking.
- Use it like ricotta for homemade lasagna.
- My favorite way to eat cottage cheese (and the main reason why I make it) is to make my favorite Eastern European comfort food… vareniki.
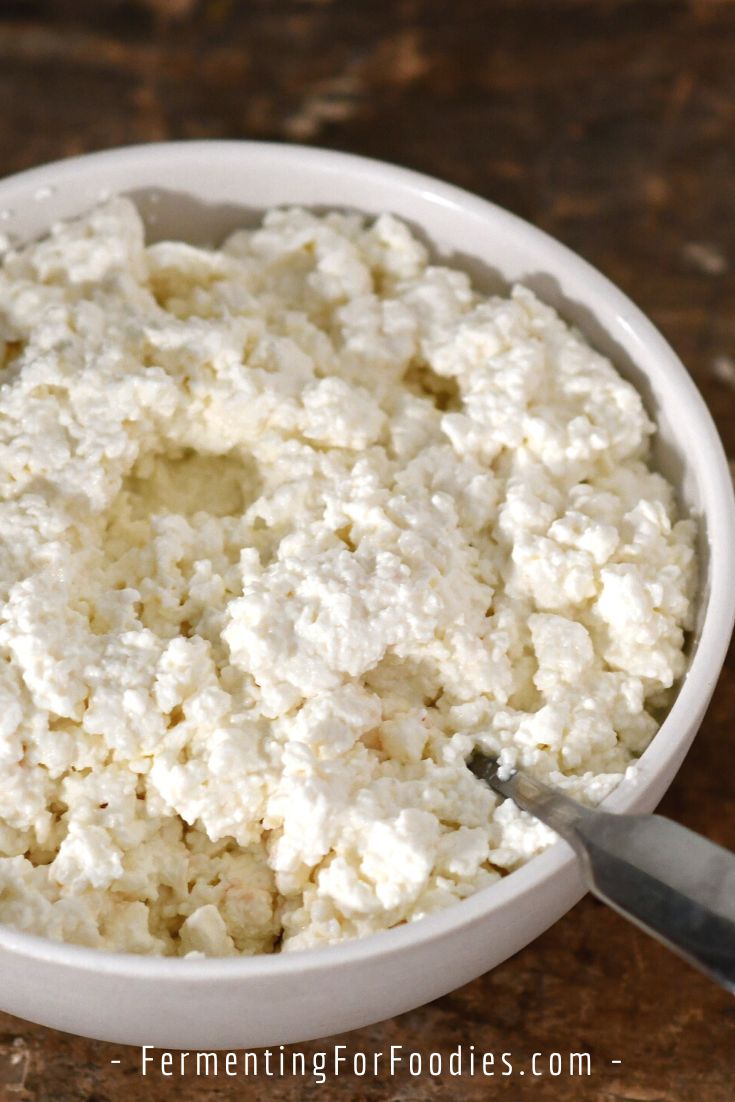
Creamy Snack-Style Cheese
Creamy snack-style cottage cheese is what is typically sold in the grocery store. Stir in some fresh fruit and you have a delicious breakfast or snack!
Here’s how to make creamy cottage cheese:
- Follow the recipe, including rinsing and draining the curds.
- Move the drained curds to a bowl. Stir 1/4 cup heavy cream and 1 tsp of salt (to taste). This is the amount for a whole batch, so use less cream and salt if you are only doing smaller amount of cheese.
- Store the curds in an air-tight container in the fridge and use within 2 weeks.
Pressed cheese
Pressing cottage cheese into a firm block is traditional. It won’t result in a cheddar-like slicing cheese. However, it will melt and is perfect for pizza or grilled cheese sandwiches.
Here is how to make pressed cottage cheese:
- Move the rinsed and drained curds to a bowl.
- Mix 1 tsp of non-iodized salt (or cheese salt) into the curds.
- Pack the curds into a cheesecloth-lined mold. Press for 12-24 hours, rotating halfway through.
- Here’s a post on how to make a cheese press out of a tin can.
Cottage Cheese Recipe
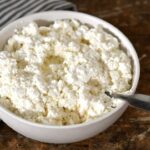
Traditional cottage cheese is made with buttermilk. It’s a low-lactose, rennet-free, and probiotic cheese! Cottage cheese makes a delicious snack, or press it into a firm, slicing cheese!
- Prep Time: 15 minutes
- Cook Time: 30 minutes
- Total Time: 45 minutes
- Yield: 6 cups 1x
- Category: Cheese
- Method: Clabbered
- Cuisine: Traditional
- Diet: Vegetarian
Ingredients
- 1 gallon (4 liters) non-fat milk
- 1/2 cup cultured buttermilk (see notes)
- 8 cups of water
Instructions
- Pour milk and the buttermilk into a large pot. You will need enough room to add 8 cups of water so use a large soup pot. Leave the milk on the kitchen counter for 12 to 14 hours, until it has clabbered.
- Cut the clabbered milk into 1-inch curds. Heat 8 cups of water to 100 F, then add it to curds.
- Keep the curds at around 100F (38C). (See notes for suggestions on how to do this). Gently stir the curds every 5 minutes for 30 to 60 minutes. The curds will be finished cooking when they are separated from the whey and sink to the bottom of the pot. (See the photo above).
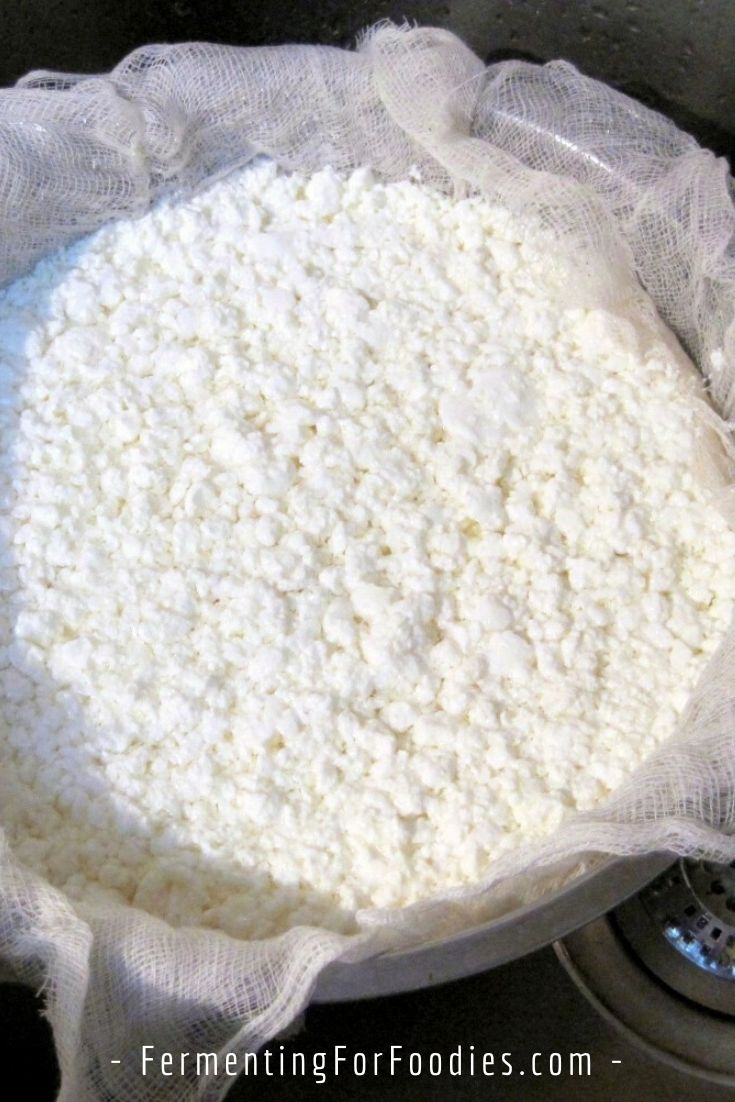
- Pour the curds into a cheesecloth-lined strainer. Rinse the curds with cold water, then allow to drain for 1 hour, until most of the whey is gone.
- At this point, you will have dry curd cottage cheese. See the section above for details on how to finish your cheese for creamy cottage cheese or pressed cheese.
Notes
- Don’t bother using higher-fat milk. The fat is drained off with the whey.
- If this is your first time making cheese, I recommend reading up on how to make cheese, for more details about each of the steps.
- It can be hard to find well-cultured buttermilk in the grocery store. I recommend testing store-bought buttermilk before using it to make cottage cheese. The easiest way to test buttermilk culture is to use it to make more cultured buttermilk. (I have found a brand that works… but I have also had failures with several local brands of buttermilk. Just having culture on the label doesn’t mean it’s a live culture.)
- This recipe results in creamy and delicious small curd cottage cheese. If you want to make large curd cottage cheese, see the section above for 3 additional steps that are a bit more advanced.
- Here are three options that I have used to keep curds at 100 F:
- Very low heat on the stove. This isn’t recommended for other types of cheese. However, the likelihood of burning the whey is reduced because there is so much water added to the pot.
- Place the pot in a sink filled with hot water. (Like a water bath or double boiler).
- Now I use my folding fermentation box, which makes everything easy!
Nutrition
- Serving Size: 1/2 cup
- Calories: 102
- Sugar: 0.4g
- Sodium: Optional
- Fat: 2.2g
- Saturated Fat: 1.4g
- Carbohydrates: 4.1g
- Fiber: 0g
- Protein: 15.5g
Is the milk pasteurize skim milk?
I use pasturized milk. But non-pasturized would be even better!
what do you mean by a basin of water? “Keep at 100F by putting it on the stove in a basin of water.”
do you mean a double boiler type situation ???
Sorry, this is an older recipe. I do mean a double boiler; however, there are other options. Here’s a more detailed post on heating milk for cheesemaking: https://www.fermentingforfoodies.com/archives/1747
Hello–how much cheese does this recipe yield?
Thanks!
Yield will depend on a lot of things… what kind of milk you use, how good the buttermilk culture is. On average 1 gallon of milk will make about 4 cups of dry cottage cheese.
I read your post about fermenting . I had a gallon of whole milk and a quart of butter milk . I followed your instructions .. One gallon in stainless steel pot with half cup butter milk – nine hours have passed and still looks like when i put it in the pot does the whole milk not work?
Actually, I had that happen recently with store bought buttermilk (I like to test my recipes in different ways). I decided that it’s probably because the buttermilk culture wasn’t very strong, so I left it for longer, and it took about 24 hours to clabber! Going to rewrite the recipe in the next few weeks with this issue in mind. Keep fermenting trying! It should be fine with whole milk.
Hi Emillie,
How long will it keep in the fridge? I have a bread proofing setting on my oven. When I looked it up, it said about 85-95 Fahrenheit. If the pot with the cheese mix is set in a pan of boiling water, and the oven is at that setting, would that work?
Thanks,
Susan
It will clabber at room temperature (unless your house is extremely cold!) For cooking after the clabber, then I guess you could use your oven. However, it will make stirring more work.
It should last for at last 2 weeks in the fridge, or longer if you sanitize everything.
My milk did not clabber. It’s been on the counter for 12 hours and looks no different. I used Lucerne non fat milk and Lucerne buttermilk. They do not say they are “ultra pasteurized” but I am guessing that their pasteurization is the issue?
My guess is that the Lucerne buttermilk doesn’t have a good culture. I’ve had issues with certain brands. My best success was with a local brand Island Farms. But that’s likely only in Canada. I don’t have Lucerne buttermilk in my grocery store, so I can’t say if it’s any good. Try either organic or smaller dairy brands.
When you find a good culture, you can keep it going by making your own buttermilk: https://www.fermentingforfoodies.com/homemade-fermented-buttermilk/
The good news is that you can still drink the milk or use it for baking. At least it’s not a waste. I do recommend trying again with a different buttermilk. Good luck!
My milk didn’t clabber at all. I made sure to use a live culture buttermilk, and I also used the whey from a cultured cottage cheese. (Grace Harbor and Nancy’s respectively) I used nonfat milk, heated it like I do when I make yogurt, let it cool to room temp, whisked in the whey/buttermilk, and let it sit at room temp for 12 hours.
I wonder if you might have overheated the milk? When we heat milk for yogurt, we make it really hot to denature (break apart) the protein. That’s what makes nice creamy yogurt that doesn’t clabber into curds. With cheesemaking, you only want the milk to be hot enough for the culture, you don’t want to denature the protein.
It finally clabbered after 24 hours. I always heard heating the milk was to kill existing bacteria, and the texture was due to the bacterial species being added. Perhaps it denatures some proteins too, but many will refold upon cooling, and I’m sure some are already denatured due to pasteurization. Anyway, the milk did finally clabber, it just took a long time!
Glad it worked! It’s really about how HOT you heat the milk. (Hence why UHT milk doesn’t work). Milk is pasteurized at 145 F, protein denatures at 175 F. 🙂
Do you have a recipe for making vegan cottage cheese and other vegan cheeses?
I’ve experimented with a few recipes… including a millet based cheese, which really didn’t work out! 😉 I do love my cashew miso cheese: https://www.fermentingforfoodies.com/cashew-miso-cheese/
I use raw milk. Can I use soured raw milk in place of the buttermilk? I always substitute that in recipes.
Hum… I’ve never had access to raw milk. Will it set a curd if left out on the counter? If so, then you could certainly try it! Good luck!
Waaaait a minute, isn’t the first part of this recipe almost the same as the recipe for buttermilk? Mix milk with a smaller amount of buttermilk and wait long hours? Is it just the extended time that we’re counting on for clambering? Could you just leave buttermilk on the counter for 4 hours to clabber?
Yup! As long as you’re using cultured buttermilk (not the leftovers from making butter). However, you’ll need a lot of buttermilk, otherwise you won’t end up with very much cheese. Cheers!
Hey Emillie!
I was wondering if you have tried to press the curds into a hard cheese and what your results would be? Or if you haven’t if you have suggestions on how to proceed with it once it’s pressed?
Thanks!
David
I haven’t tried pressing cottage cheese (simply because I love it too much!) However, they should knit together into a clabbered cheese, similar to feta. You can check out my general cheese-making posts, or this post on making hard kefir cheese: https://www.fermentingforfoodies.com/pressed-kefir-cheese/ Enjoy!
This worked really well for me! Thanks for the recipe.
I am looking for some insight, I have just tried your recipe for my third attempt at Cottage Cheese. I used Avalon buttermilk and 2%island farms milk, the clabber process took 24 hours as my house is quite cool this time of year. Everything looked great until after heating curds are very grainy and not sink. They taste right just not sure where I could have gone wrong with the texture.
Hum… do you have yeast-based cultures in your home? Floating curds usually means the milk is contaminated by some other culture. If it was a bad bacteria it would taste awful. So that’s why I’m guessing it’s due to yeast. Probably the best way to avoid it is to set the buttermilk up to culture as far away from your yeast culture as possible.
Good luck! Emillie
Oh never thought of that I do have sourdough starter, it tasted great just like store bought…just didn’t fool my kids with the texture! Thank you so much
Hopefully you can find somewhere away from your kitchen to culture the milk. It’s fine to set it up in your bedroom! Cheers, Emillie
has anyone tried this using homemade yogurt instead of buttermilk? I made a batch yesterday. It took a. long time to clabber At 24 hrs, I got impatient & didn’t wait for it to firm up enough to cut into the little squares. It tastes good but the texture is more like whipped cottage cheese.
Yogurt is a heat-set culture, which is probably why it took so long to clabber. Buttermilk cultures at room temperature. It sounds like you ended up with something like a yogurt cheese! It is definitely a less firm cheese. Cheers!