
There are a lot of specialized cheese making supplies that you could buy. However, if you’re anything like me (4 people in a 3 bedrooms urban townhouse with no garage/basement/attic) then you probably don’t have space to store unnecessary stuff!
Here are the essential supplies needed to make cheese. It includes things you already have along with some simple DIY alternatives.
This post on cheesemaking equipment is part of a larger series of posts on cheesemaking. Check out how to make cheese for a complete list of topics.
Supplies You Already Have In Your Kitchen
Here are some cheesemaking tools that are probably already in your kitchen:
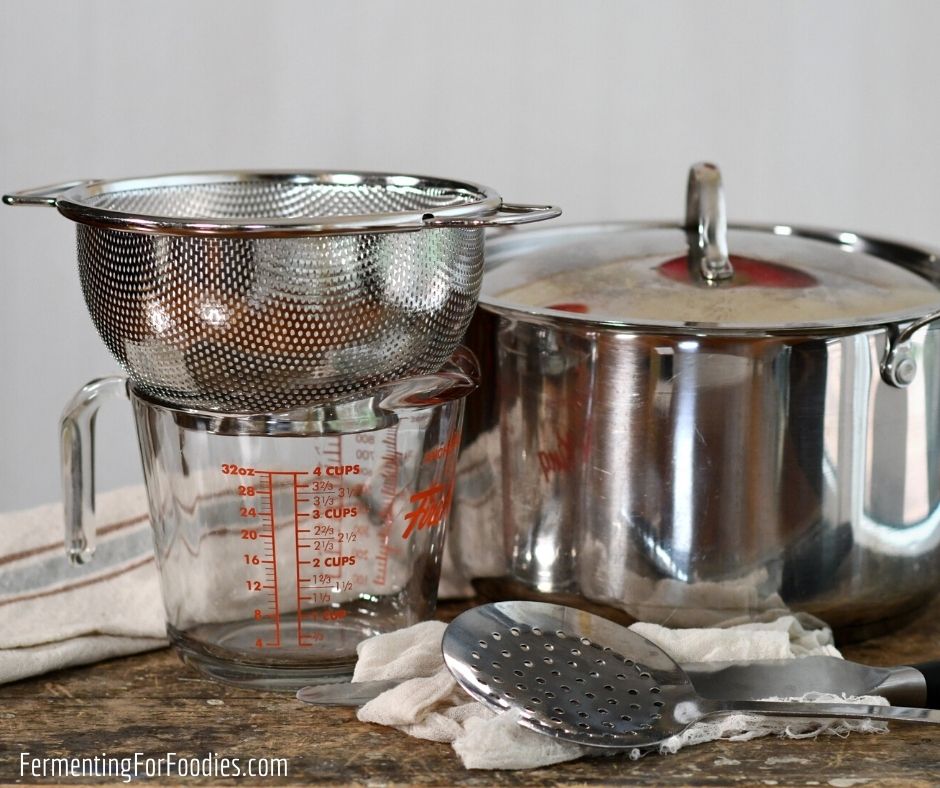
- Large pot for heating milk.
- Measuring cups, spoons, or a scale for measuring ingredients.
- A long knife for cutting the curds. I use a bread knife.
- Colander and slotted spoon for scooping and draining the curds.
- A cookie sheet with a cooling rack for draining whey during pressing.
Specialized Cheese making Supplies
There are some specialized cheese making supplies that are necessary if you plan on making cheese regularly. However, if you are an adventurous foodie type of person, then you may already have some of these in your home!
1. Sanitation Chemicals
Sanitation is important if you are making aged cheese. It is not as vital for fresh cheeses.
Boiling water can be used to sanitize metal and glass, but if you have a plastic cheese mold or wooden mat, then you’ll need sanitation chemicals.
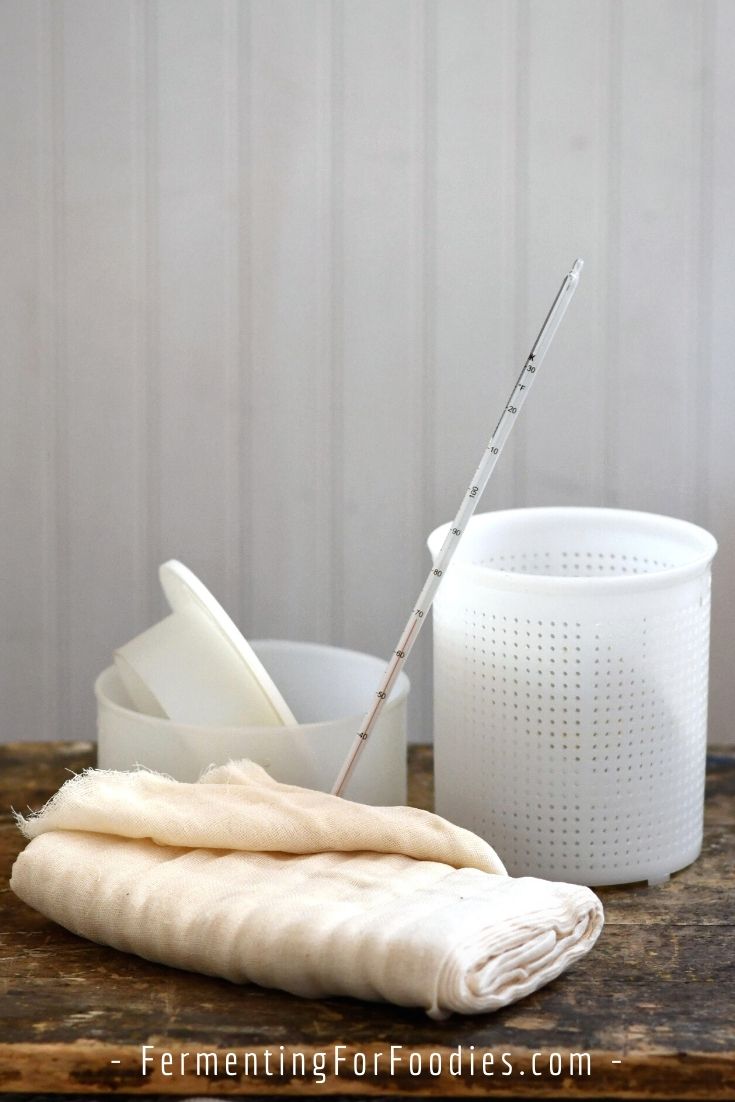
2. Thermometer
Most types of bacterial culture and rennet need the milk to be maintained at a particular temperature. A thermometer with good precision in the lower ranges (80-100F, 26-36C) is necessary.
3. Double boiler or incubation chamber
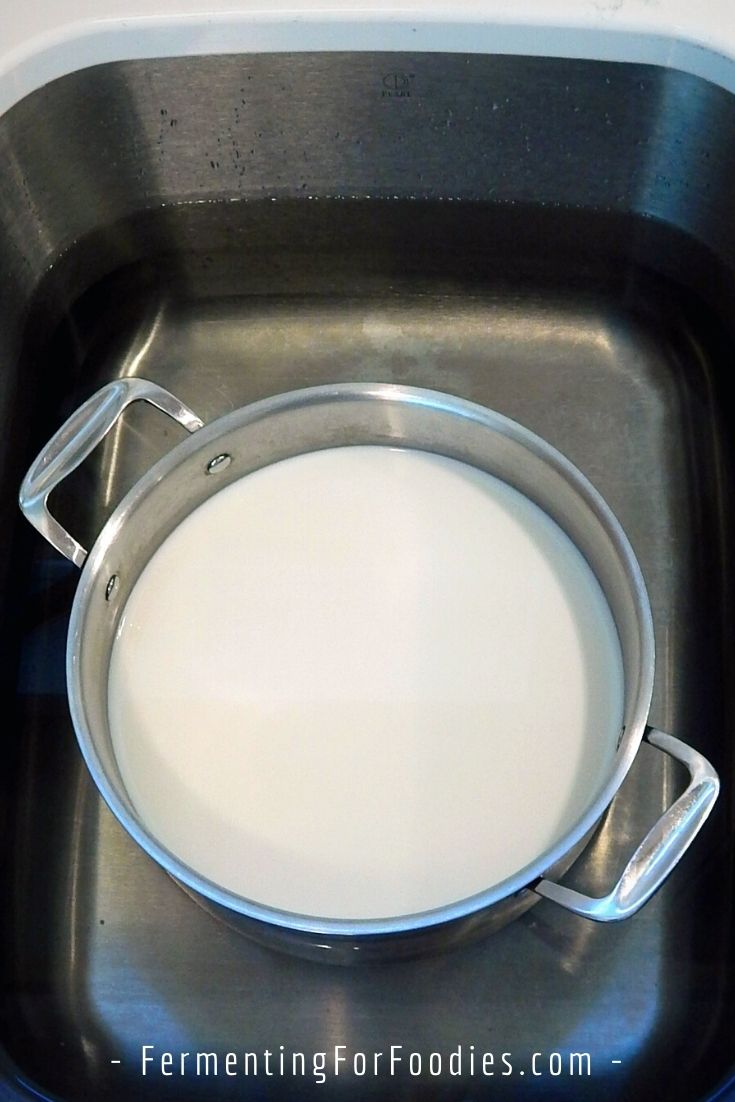
The hardest part of cheese making is maintaining the specific temperatures required for inoculation and heating the curds.
Start by slowly heating the milk up on the stove to the correct temperature for inoculation. Stir frequently to ensure even heat distribution and to prevent the milk from scalding on the bottom of your pot.
Then maintain the temperature with one of the following methods:
- I’m lucky enough to have an incubation chamber. (Officially a bread proofer). I use it for everything from yogurt to tempeh. It is also perfect for making cheese.
- Nest the pot in a sink filled with boiling water. Monitor the temperature and add more boiling water as needed.
- A double-boiler on the stove can maintain heat with a low simmer. However, the heat will only come from the bottom and you can’t stir the milk to ensure even heat distribution while the rennet sets. So I recommend trying one of the other two options instead.
4. Butter muslin
Butter muslin is like cheesecloth that you can get at the grocery store, however, it has a very fine weave. It is necessary for draining, pressing, and wrapping cheese. Don’t use cheesecloth because it’s not fine enough. A non-fuzzy tea towel is a better replacement.
5. Cheese Molds
Cheese molds are the forms that hold the curds for the final draining and pressing. I received a few plastic molds as gifts. (What else do you get a fermentation foodie?)
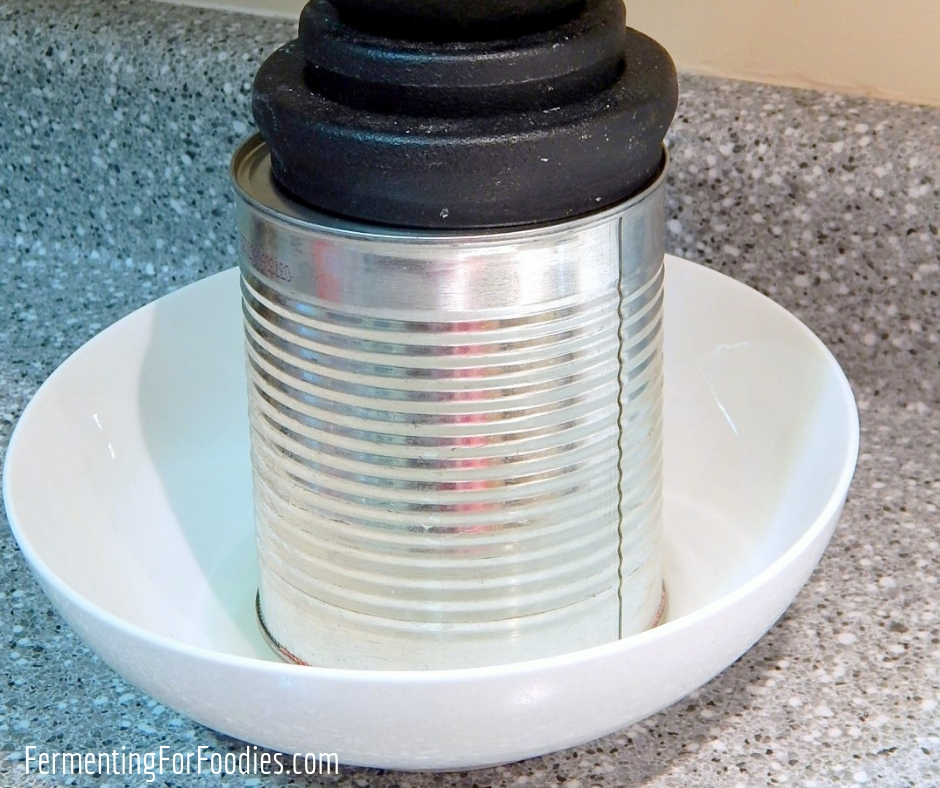
While it’s tempting to make molds out of plastic yogurt tubs, they need to be firm enough to withstand up to 40 lbs of pressure while pressing cheese. A tin can is actually a better alternative.
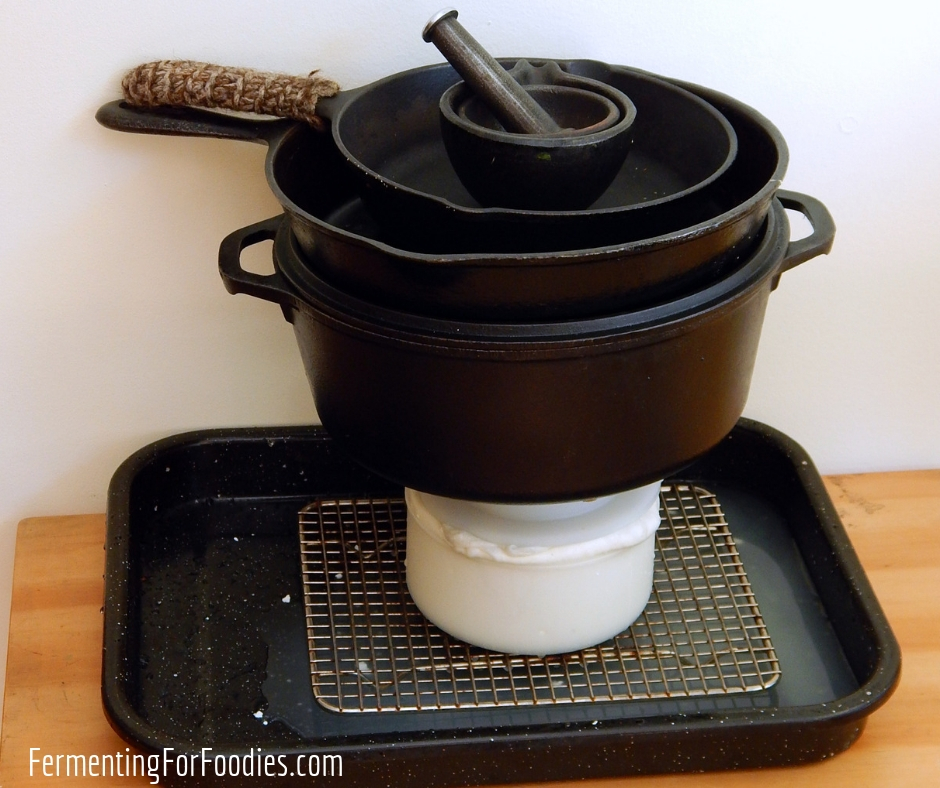
Before I had proper cheese molds, I used a large tin can. The top of the can acted as the follower. I pressed the cheese by sticking a glass mason jar under the can. It wasn’t very sophisticated, but it worked for soft cheese.
Here’s a picture of the setup. It’s hard to tell, but the tin can is actually floating with the glass jar underneath:
Supplies needed to make aged hard cheese
There are three additional things that you need to make hard cheese.
1. Cheese mats
Cheese Mats or sushi mats are used for draining and air-drying cheese. They are only necessary if you are making hard cheese.
2. Cheese Press
A proper cheese press is used to put a certain amount of pressure on the cheese to press the whey out of the curds. The amount of pressure used depends on the type of cheese. It’s increased at slow increments throughout the pressing process.
I don’t have a cheese press, so this exact science of pressure is more about figuring out how much weight I can balance on top of the follower. I usually use a combination of canned food and cast iron cookware. The goal is to just approximate the required pounds of pressure by using pounds of weight.
For example, if I need 10 lbs of pressure, then I pile up about 10 lbs of weight on top of my follower. The only downside is that I really can’t get up to the required amount of pressure for hard cheeses, however, I do get pretty darn close. To help with the balance, I usually set up my press on the floor in the corner of my dining room, so even if it does come crashing down it won’t do too much damage.
3. Cave
Hard cheeses and mold-ripened cheeses need to be aged in a cave. There are caves available on the market, however, you can use any cool place. The temperature needs to be between 45-55F (10-15C) and it shouldn’t be too humid.
I have a closet that is on an exterior wall of my home that has a “cave-like” temperature in the winter. (Not great for clothes, but perfect for all my ferments)! You could also use a cold room, a cellar, a garage, or even a bar fridge.
Leave a Reply