
Want to make soy-free miso? This basic recipe can be made with other dried beans or split peas. Try experimenting with other flavors.
Did you know that it is REALLY easy to make miso? While it’s not a particularly quick ferment, it’s super reliable. Just pack your ingredients into a jar and you’re done! In 3 months to a year, you’ll have a delicious jar of miso.
Miso is even EASIER if you make it soy-free! The hardest part of traditional miso is cooking and mashing the soybeans. They are so much firmer than other beans, so it takes a bit of work.
This basic miso recipe can be made with any legume.
- Chickpeas are a classic alternative because the resulting miso has a very similar color to the traditional soy.
- Split Peas are my personal favorite because peas are SO affordable and have a nice smooth texture.
- Black beans, pintos, kidney beans make a rich, dark-colored miso.
Experimenting with miso
Soy-free miso can be made from all sorts of vegetarian grains, seeds, and nuts. Bread miso, cashew miso, and millet miso are all possible! This recipe is designed for beans, but once you get the basic process down, feel free to experiment!
My favorite local miso maker (and fermenting friend) also adds other flavors to her miso. Our favorite flavors are leek and jalapeno. But there are so many other flavor options!
This recipe is based on a basic, medium-flavored miso. Here are a few ways to experiment with miso:
- more or less salt
- more or less koji
- age for 2 weeks or up to 2 years
Changing any of these factors will influence how sweet, salty, or earthy the miso is. I recommend getting comfortable with the basic recipe first before playing around with salt or koji ratios. It’s fine to start eating your miso after 2 weeks for a sweet miso or after 2 years for an earthy miso.
Feel free to have fun with your miso!
If you want a bit more details about how to make miso, here’s a video of mixing and packing a batch of split pea miso.
Soy-Free Miso (With Split Peas Or Beans)
Want to make soy-free miso? This basic recipe can be made with other dried beans or split peas. Try experimenting with other flavors.
- Prep Time: 20 minutes
- Cook Time: 1 hour
- Total Time: 1 hour 20 minutes
- Yield: 6 cups 1x
- Category: Condiment
- Method: Fermentation
- Cuisine: Japanese
- Diet: Vegan
Ingredients
- 2 cups dried split peas or beans (see above for other options)
- 8 cups of water, divided
- 2 cups koji rice or koji barley
- 1/2 cup sea salt (non-iodized)
- 1 Tbsp mature fermented miso (see notes)
- 1 tsp of sea salt (not mixed into the ferment)
Instructions
- This is definitely a recipe for a work-from-home day or the weekend. It involves a lot of waiting, but not a lot of actual cooking.
- Place the peas or beans in a large pot. Cover them with at least 4 cups of water, and leave them to soak for 6 to 8 hours.
- Pour the soaked beans into a strainer, to drain away the water. Place them back in the pot with 4 cups of fresh water. Bring to a boil, reduce the heat, and simmer until they are softening (about 45 minutes to 1 hour).
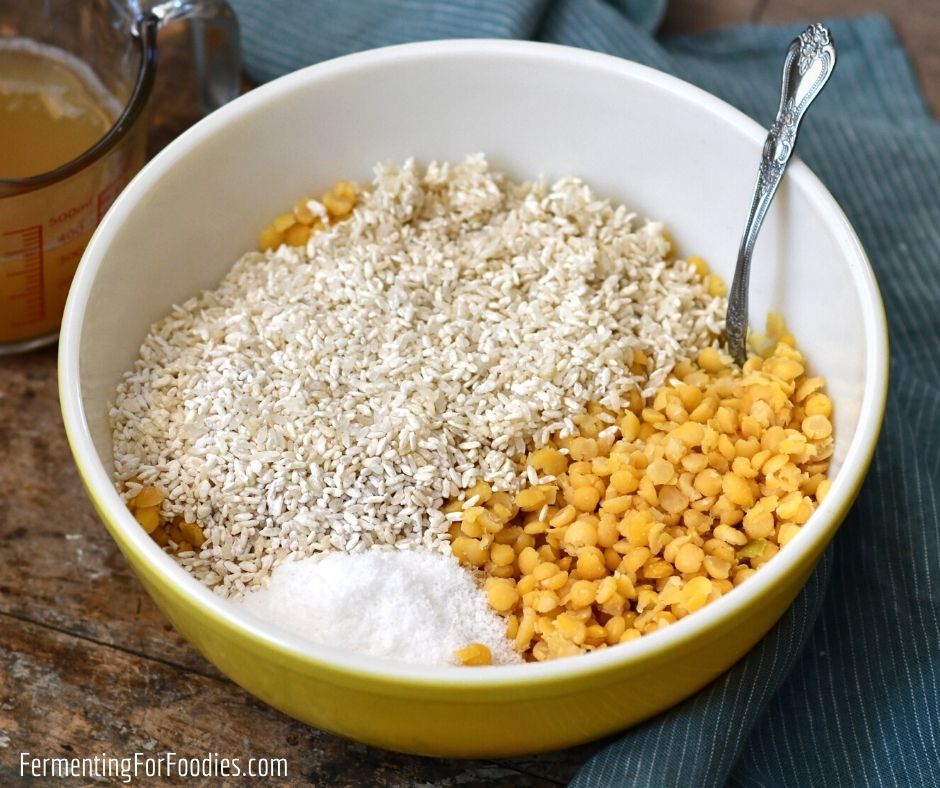
- Drain the beans, reserving 1 1/4 cups of the cooking water. Place the beans in a large mixing bowl and leave them to cool to room temperature (2 to 3 hours). When the beans have cooled, add in the koji rice, 1/2 cup of salt, and reserved cooking water.
- Wash your hands and sanitize the container(s) that you will be packing the miso into. It’s important to have everything nice and clean for this long-term ferment. See notes for more details. With clean hands, mash the peas/beans together with the rice, salt, and mature miso. It can be as coarse or smooth as you want. This will determine the consistency of your miso, so keep massaging the beans until you’ve reached a good consistency. (See the video above for my demonstration).
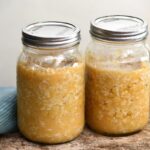
- Pack the mixture into the container(s) for fermentation. Make sure you have at least 2 inches of headroom because liquid will bubble up during the fermentation. See the notes for different fermentation container options. Sprinkle the final teaspoon of salt on top of the packed miso mixture.
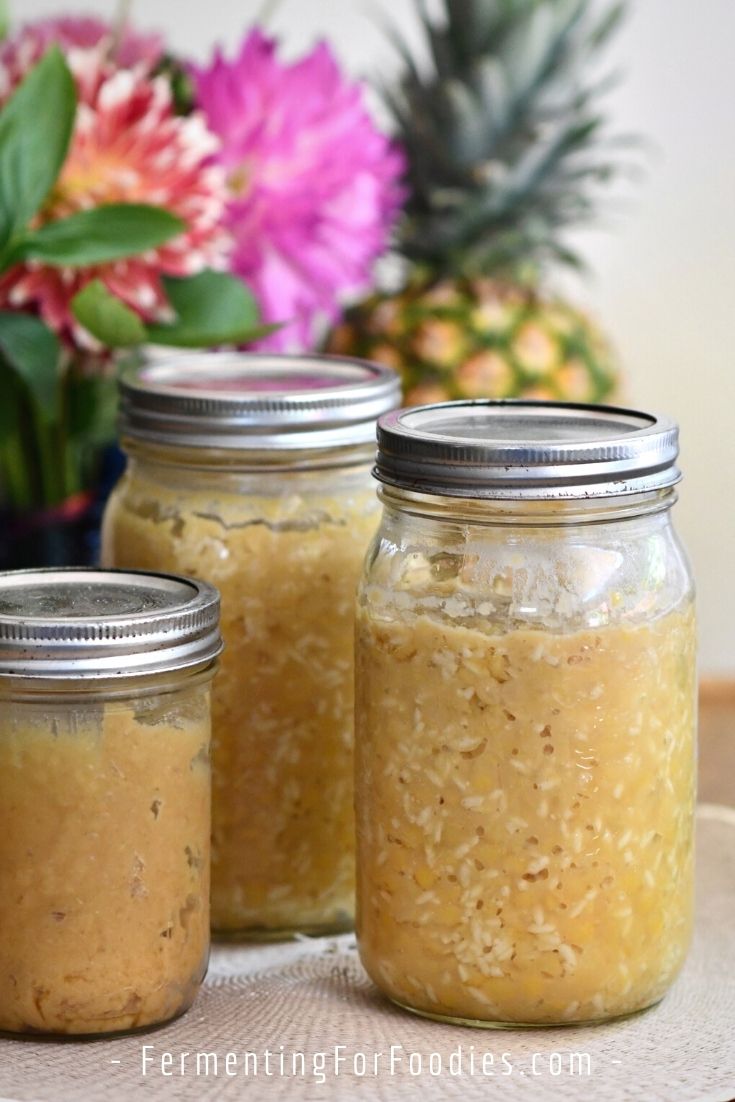
- Cover the miso with a piece of plastic wrap or parchment paper. Use a weight to keep everything weighed down during fermentation. Place the container in a cool, dark location (a basement or closet is perfect). Leave it to ferment for at least 2 weeks for sweet miso, and up to 2 years for a richer, savory miso. I usually pack my miso into a few different jars so I can enjoy some of it when it’s young and leave the rest to keep aging.
- The miso will slowly produce a layer of dark brown liquid called tamari, which can be drained off after fermenting to be used like soy sauce.
- Once you’ve opened the jar of miso, store it in the fridge. It should last for several years.
Notes
- The secret to ensuring that everything ferments nicely is to sanitize the fermentation container(s) prior to use. I usually sanitize by filling my containers with boiling water to kill any surface bacteria and mold.
- Miso is a mold, yeast, and bacterial ferment. Adding a bit of mature miso provides the necessary yeast and bacterial culture. When making your first batch, it’s fine to use store-bought miso. Look for brands that are refrigerated as they will be unpasteurized and alive.
- Miso is traditionally made in large crocks, but it’s fine to use glass jars too. I don’t like plastic for this ferment, because it ferments for a really long time, and the high salt content may cause the plastic to slowly degrade.
- Want to get deep into the world for fermenting? Try making your own koji rice!
If I want to make this for someone allergic to soya, is there an alternative to the miso as a source of bacteria and yeasts?
I talked to my miso-making friend about this… she says that it’s fine to not use miso as a starter culture. It will just take longer for the bacteria and yeast to do their share of fermenting, but eventually, they’ll be part of the process. The miso will taste sweet (relatively) until the bacteria start to acidify the ferment. Then be sure to save a bit of this batch of miso to help culture your future batches. Enjoy!