We eat fermented granola for breakfast nearly every day. It’s quick, healthy, and filling, with a deliciously crunchy taste that pairs nicely with fresh fruit (our preferred way to eat it). Use your favorite culture: sourdough starter, yogurt, or kombucha!
In order to run this site, Fermenting For Foodies sometimes earns an affiliate commission on the sales of products we link to. We only feature items we genuinely want to share, and this is an arrangement between the retailer and Fermenting For Foodies. Readers never pay more for products. Thank you for reading!
Why Soak and Ferment granola?
Pre-soaking and fermenting the oats and seeds for homemade granola is the best way to get the most out of your breakfast.
- Soaking makes the oats easier to digest. So your breakfast won’t leave you feeling sluggish and full.
- It’s a great way to make a crunchy toasted breakfast cereal without using any sweetener. Feel free to add some maple syrup or honey for sweetness, but it’s not necessary!
- Use your favorite culture! Fermented granola can be made with sourdough starter, milk kefir, yogurt, vegan yogurt, or kombucha!
- Fermenting causes the oats to break down and clump together in delicious granola clusters.
- Sourdough granola is particularly good at forming large clusters of oats.
Mix up your granola
The best part of making your own granola is that you can mix in all sorts of different flavors! Here are a few suggestions:
- Substitute up to 2 cups of the oats with rolled spelt, rye, or barley. (Don’t do this if you’re GF).
- After cooking, mix store-bought cereal into granola to make it less dense. Try mixing in cereal flakes, crispy rice, or whatever you enjoy!
- Add flax seeds, sesame seeds, hemp hearts, coconut flakes, or chia seeds after the granola has cooked for some healthy omega fats and added fiber.
- Adding dried fruits is a great way to naturally sweeten granola.
- Mix in some superfoods to kick-start your day: bee pollen, maca powder, or whatever else your body desires.
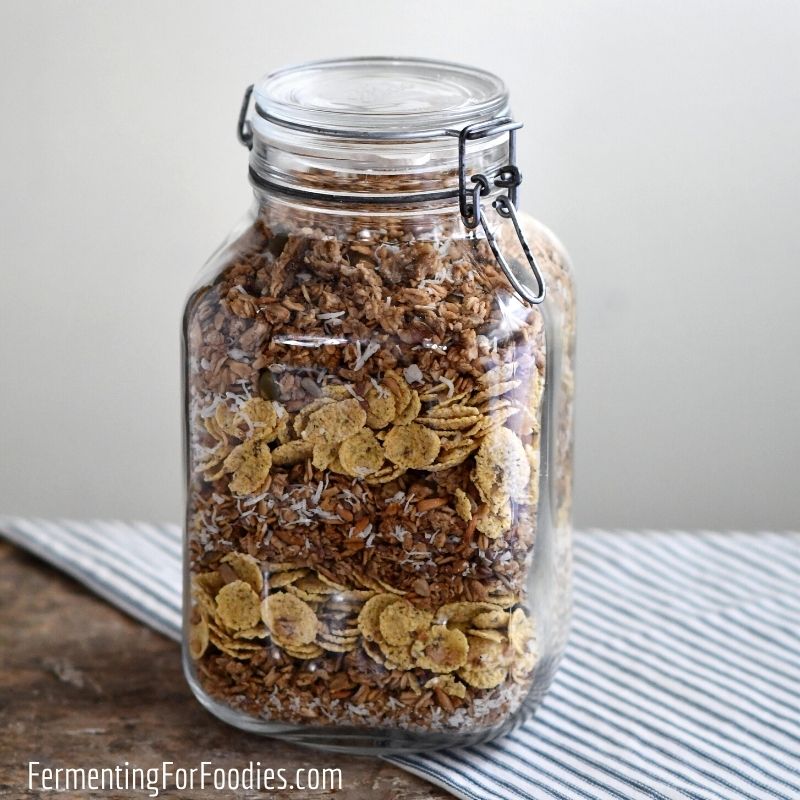
Fermented Granola
Fermenting granola before cooking is a great way to make crunchy, toasted granola without using any additional sweetener. It is a healthy and nutritious way to start your day. Use your favorite culture, sourdough starter, kombucha, or yogurt!
- Prep Time: 15 minutes
- Cook Time: 1 hour
- Total Time: 1 hour 15 minutes
- Yield: 10 cups 1x
- Category: Breakfast
- Method: Fermented
- Cuisine: Healthy
- Diet: Gluten Free
Ingredients
Units
Scale
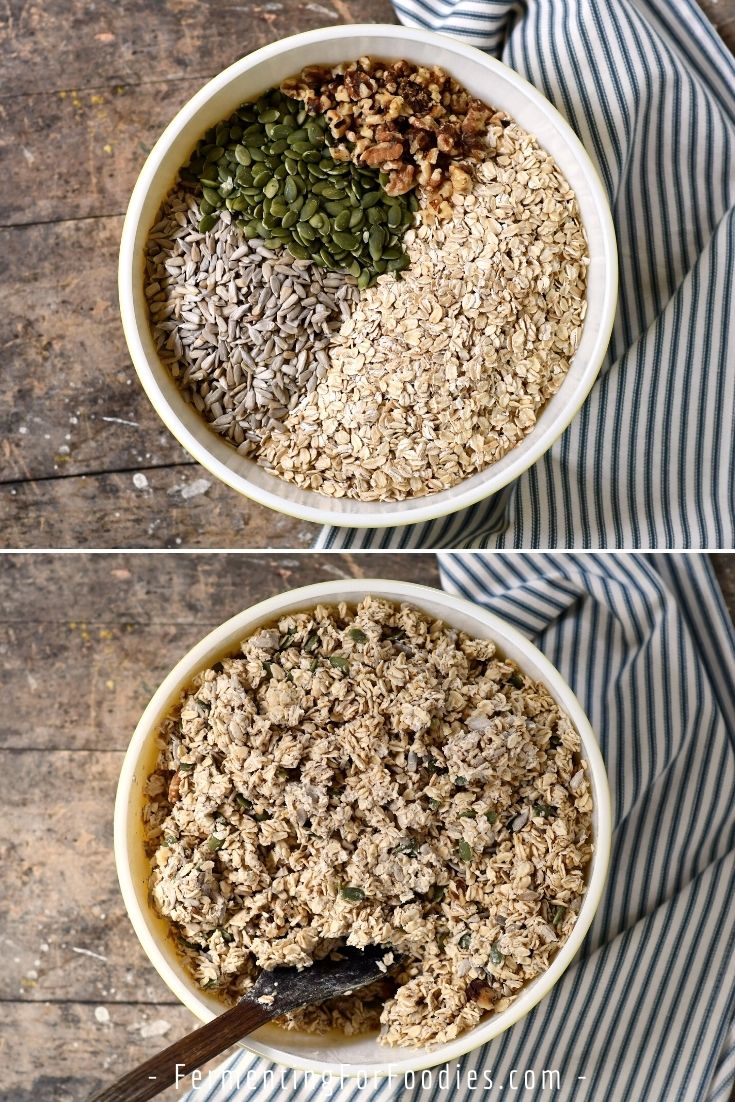
Pre-Ferment
- 8 cups of rolled oats
- 2 cups mixed nuts and seeds
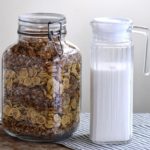
- 1 cup culture (see notes)
- 2 cups of filtered water
Remaining Ingredients
- 1 tsp salt
- 1 Tbsp ground cinnamon
- 1 Tbsp vanilla extract
- 1/2 cup oil (vegetable or melted coconut)
- 1/2 cup of liquid sweetener (optional)
Instructions
- Mix the oats, seeds, culture, and water in a large bowl. Allow the mixture to soak for at least 30 min and up to 12 hours. Stir the soaking granola at least twice during the first 2 hours of the fermentation to keep it from forming large clumps at the bottom of the bowl.
- When you are ready to bake, mix in the remaining ingredients and stir thoroughly to combine. Feel free to skip the sweetener in this recipe (see notes).
- Spread the granola mixture out in an even layer on 2 large cookie sheets and toast at 300 F (150C) for 1-2 hours, stirring every half an hour until it’s crispy.
- Allow to cool before mixing in any dried fruit, cereal flakes, etc. See the section above for more delicious flavor options.
- Store in an air-tight container and enjoy within 1 month.
Notes
- Pre-fermenting this granola recipe is optional. If you’re short on time, mix in the liquid and allow it to sit for at least 30 minutes so that you can enjoy crunchy granola without added sweetener.
- Any fermented liquid will work for culturing granola. Dairy products, vegan yogurt, or sourdough starter are all delicious options.
- Liquid sweeteners for this recipe include honey, maple syrup, agave, etc. Personally, we don’t use any sweeteners, however, we always serve fresh fruit or dried fruit with our breakfast for some natural sweetness. Granola without any sweetener is a bit strange at first, but we’ve learned to love it!
Nutrition
- Serving Size: 1 cup
- Calories: 298
- Sugar: 13.9g
- Sodium: 211mg
- Fat: 22g
- Saturated Fat: 2.5g
- Carbohydrates: 21.2g
- Fiber: 2.8g
- Protein: 6.8g
- Cholesterol: 1mg
Is this milk or water kefir?
I use milk kefir, but you could probably use kombucha or water kefir too. Might affect the flavour, but would be interesting to try!
What a lovely idea, Emillie! Thanks for supplying a recipe. I’m a diabetic who just discovered I can eat a modest amount of cultured grains. (I’m also an American German whose middle name is “pickled.” 😉
We make ours a bit heavier on the nuts too. And I actually don’t sweeten it… which took some getting used to, but now we all like it just fine. And Pickled is a fabulous middle name!
This stuff rocks! We do a double-batch of this granola every week or two. To make it last (popular with the kids), we like to “dilute” the granola with a bulk bag of flakes of some kind. Works great!
What kind of filtering do you do to get chlorine out of the water? Does our supply in Victoria have high levels of chlorine? I’ve been using regular tap water for all of my fermentation and haven’t had any troubles, so I’m not sure if I really want to invest in a filter…
I use submerged charcoal filters. Pour through filters don’t do much for our water supply as it is treated with chloramine which is very stable. Saying that, I know lots of people that use Victoria tap water and have healthy ferments. I think our water is otherwise quite good, and they don’t use high amount of chloramine, so no need to worry.
Thanks! Good to know.
Love this recipe, I’ve been making this nearly every week for the past couple of months. One batch is enough for my girlfriend and I for an entire week. Super great to add warmed fruit on top of it for extra sweetness and healthiness.
One note, your temperatures are a bit off for the recipe. 150C is actually closer to 300F (not 250F). I find cooking it at 300F for 2hrs to be perfect, but hey, everyone’s different and all points are welcome. Much love, thank you for your wonderful work.
Thanks! We also eat it pretty much every day. I will fix the temperature in the recipe right now. Thanks for pointing that out. Cheers, Emillie
Love this! I’ve been making it for a few months now and love that it makes a big batch and is nice and crunchy and low sugar. Great way to use some discard and make a delicious breakfast for many days. I make it with 2 cups of mixed pumpkin seeds, almonds and walnuts – latter two chopped roughly – plus a cup of large coconut flakes, about 1/4 cup maple syrup, coconut oil, and I’ve upped to 2T cinnamon and 1T salt, no vanilla, and I usually cook at a bit higher temp, like 315-320, for a shorter time, until it’s browned nicely. Thank you!
Yum! Your suggestions are delicious!
I just found your recipe and it looks great! As I’m just venturing into soaking oats and other grains I am curious here….you don’t drain the oats or rinse before mixing with the other ingredients? Also you said “starter” as a possible agent. As in, whole wheat sourdough starter? I would think that would be very thick and affect the look and taste of the granola? I’ll be trying this in the next day or two. Yay!
The amount of liquid in the oats is only enough to moisten them. They’re not fully soaked (like you might do for rice or beans). Adding culture helps to break down the oats, allowing them to be clumpy and crunchy without the usual sugar. I usually use whey, yogurt or kefir as my culture. However, sourdough starter works too! I just recommend mixing the sourdough starter with the water in the recipe so it’s easier to stir into the oats. Enjoy!