
Homebrewing requires a few pieces of specialized equipment in order to do it properly. Luckily, everything is easy to find at your local homebrewing supplies store or online!
This is part of a series of posts on how to brew beer at home. Check out Homebrewing 101 for more information about brewing beer at home.
Homebrewing Kits VS DIY
All of my homebrewing equipment cost me about $100. That is just the price for things that I needed to buy to brew. It doesn’t include the cost of bottles (which I got for free), brew pot (reused a canner), etc.
Alternatively, there are homebrewing kits available. Typically, they come with everything you need for a small batch.
The biggest difference between using a homebrewing kit versus making your own kit is the size of the batch.
- In general, most homebrewers brew around 20L of beer at a time, since brewing is quite time-consuming. In our case, it’s also a social activity, so we have to split our final bottles 2-3-4 ways.
- Homebrewing kits tend to make batches of less than 10L, which is not enough for sharing.
- If you wanted to experiment with a really small batch of about 4L of beer then you probably don’t need any special equipment beyond an airlock and an auto-siphon.
Necessary Equipment
Here are the homebrewing supplies that are necessary to brew beer. Pretty much all of it can be bought for less than $50. Once you’ve invested, you’ll be able brew beer, wine, or hard cider! (We do a combination of all three, and pretty much always have something brewing.)
- Boiling Pot: The boiling pot will dictate how much beer you can brew. For a 20L batch, you need a 22L pot. We use a large canner as our boiling pot.
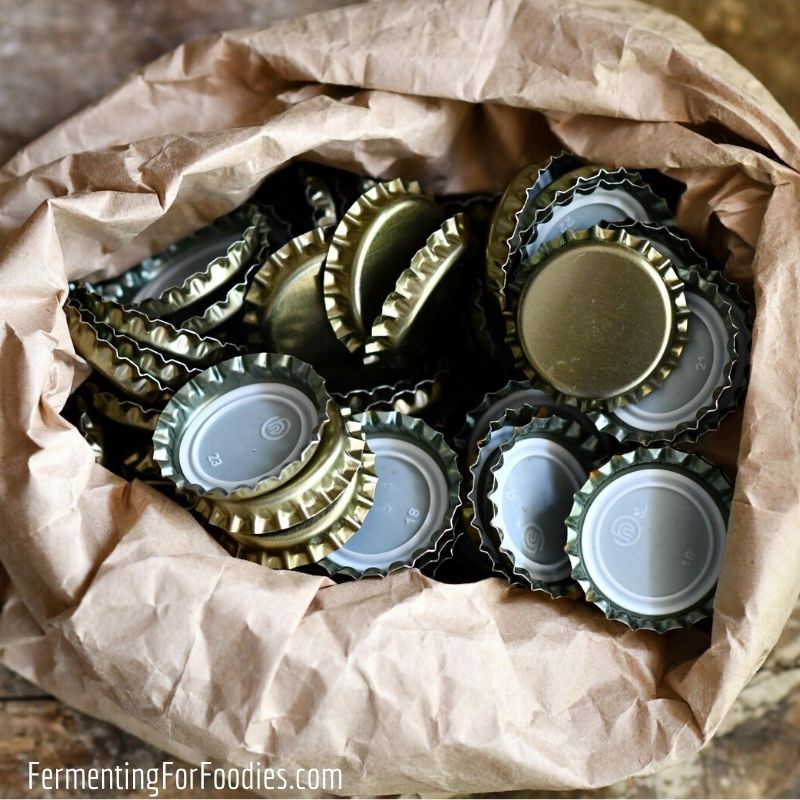
- Beer bottles and caps: The best way to get beer bottles is to save them from your recycling. You can use plastic bottles with screw lids, swing-top bottles, or regular beer bottles. If you use regular beer bottles then you will also need to buy bottle caps and rent/buy a bottle capper.
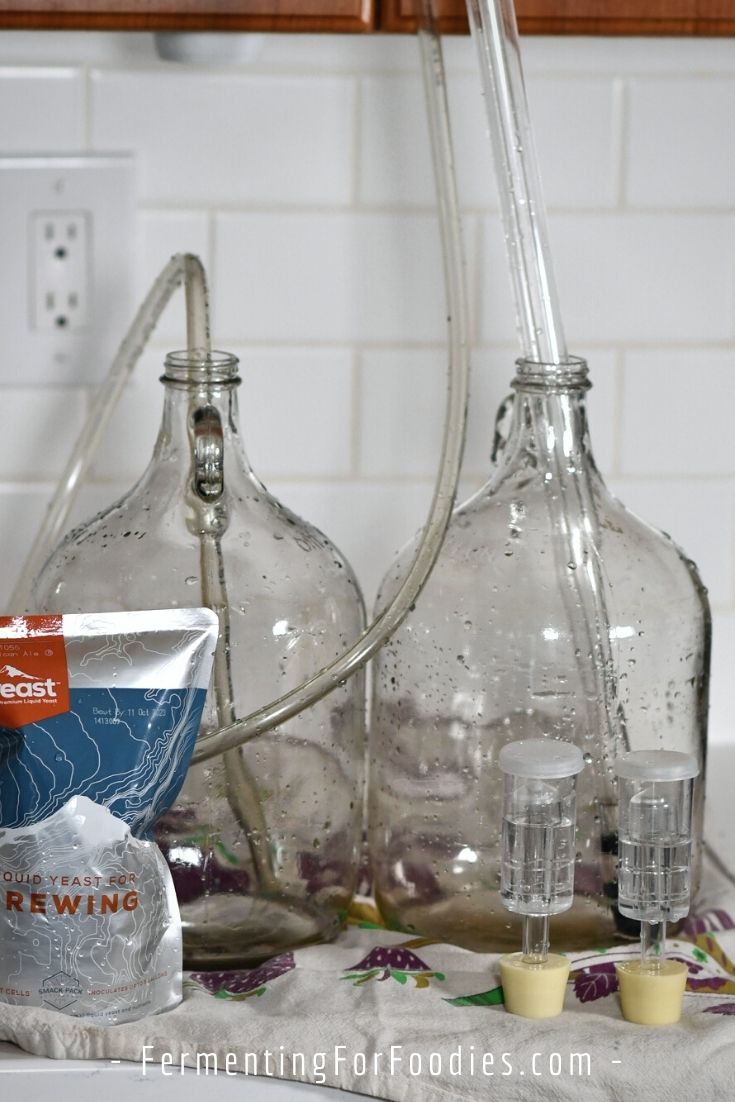
- Carboys and Airlocks: Airlocks are important if you are serious about making alcoholic ferments. At about $2 each, they’re pretty cheap. An airlock allows the CO2 to escape while maintaining a sterile environment. I recommend using cylindrical airlocks because they are easier to clean than S-shaped airlocks. You just need to make sure that your airlock fits snugly into the mouth of your fermentation jug. We use 4-liter jugs that come with apple juice. If you want to make large batches of beer you may want to invest in large carboys.
- Sanitation Chemicals: It’s important to sanitize all equipment so you don’t end up with skunky beer. Here is how to sanitize for brewing.
- Siphon and Tubes: A food-grade siphon is handy for moving liquid between carboys. They are also handy for filtering out sediment and bottling. I recommend getting an auto-siphon because it’s easy to use and they only cost about $25.
Optional Equipment
Here are some items that are handy if you plan on making a lot of beer. However, they aren’t necessary if you’re just trying it out for the first time.
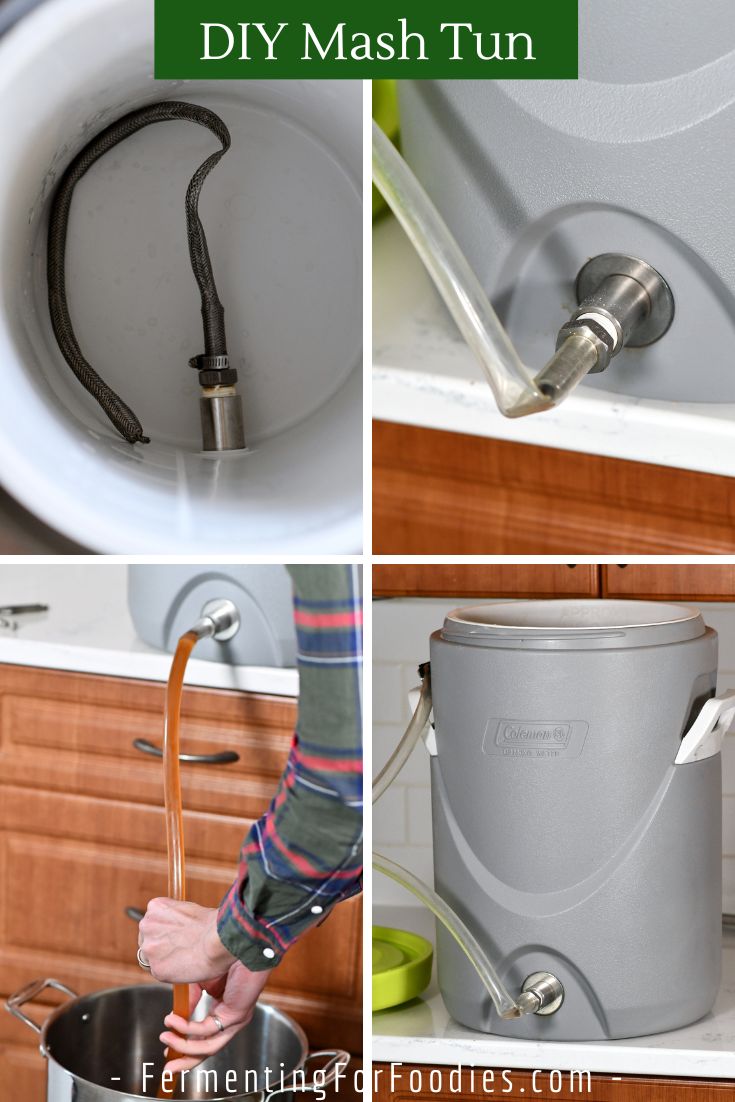
- Mash Tun: A mash tun is used for whole grain brewing. It lets you keep your grain warm for 60-90 minutes to activate the enzymes that will convert the starches to simple sugars. We made our own mash tun by adding a spigot to the bottom of a cooler. You can find more detailed instructions on how to do that here.
- Second Large Pot & Sieve: Grains can also be kept warm in a pot on the stove. This method requires a bit more attention than a mash tun, as you don’t want to overheat the wort. A sieve is used to filter out the grain when the wort is being poured into the boiling pot. Check out the step-by-step homebrewing instructions for more details.
- Brew Bag: A mesh brew bag is used to filter the grains out when extracting wort.
- Hydrometer: A hydrometer measures the approximate alcohol levels of your beer, by comparing the amount of sugar in your beer before and after fermenting. The level of alcohol is assumed by the decrease in sugar levels. Here’s more information on how to use a hydrometer.
- Wort Chiller: If you are brewing 20L of beer, then it can take a REALLY long time to cool down, which increases the risk of contamination. So it is important to cool your wort down as quickly as possible. A copper wort chiller hooks up to your sink and allows you to pass cold water through a copper pipe which is submerged in the pot of proto-beer. I don’t own one… but I live in Canada, so we stick to brewing beer in the winter and cool our proto-beer by sticking it outside for a few hours. (How Canadian is that, eh?)
When I first started brewing years ago, I bought a complete beer kit which was completely fine to begin with. After my first brew I was hooked and started buying and adding equipment. For me, my first upgrade was a wort chiller which was a huge time savor. If I could say one thing to a new home brewer is that cleaning and sanitation is the main ingredient in good beer.
Great information,
Funny but true story…
When I was in JrHi (30 yrs ago at least) I was tasked with cleaning out the garage. EVERYTHING ended up in the driveway and front yard. I found some copper tubing and I got the bright idea to coil it to make it easier to handle. I had seen hooch stills in the movies and my heritage is decidedly mountain hillbilly. In a moment of adolescent creativity I threw together a few drums and stuff, and stretched the coil of tubing between one drum and another. I expected to get a rise out of my parents (both were teetotalers), but I never thought a cop would cruise by and investigate my “operation” Only in Los Angeles I guess, where you need a permit to do most anything, and running a still is decidedly NOT for a 7th grade schoolkid.
Anyway, copper has the best thermal coefficient (second only to silver) and is naturally antimicrobial so long as you keep the surface free of debris. Making a chiller should be on par with making a mash-tun. I imagine it wouldn’t take too much engineering to make one you can feed with ice water.
Great story! We’ve thought about making a chiller… but we pretty much only brew beer in the winter. I live in Canada, so brewing in the winter is great way to heat the house… then we stick our brewpot outside for a few hours which works great for us! 🙂