


Giardiniera is an Italian pickle made of mixed vegetables that are typically preserved in oil or vinegar. This recipe for fermented giardiniera uses fermentation to preserve the vegetables instead. It is an easy, no-cook, and zero-waste recipe.

This savory blend of vegetables can be spicy (with chili peppers) or mild (without). However you like it, fermented giardiniera looks beautiful, sounds sophisticated, and tastes delizioso!
How to Serve Giardiniera
Like most pickled vegetables there are a ton of ways to serve giardiniera. My kids particularly love mild fermented giardiniera, so I can pretty much pull out a jar whenever I want them to snack on some vegetables! However, there are other serving options.
- It is often served as an antipasto or with a cheeseboard.
- Stick a jar on the table for a simple vegetable side dish or condiment.
- A Chicago-style sandwich filling.
- Serve it at a BBQ for hot dogs or hamburgers.
- Quick topping for pasta or pizza.
- Mix it into a pickled vegetable potato salad.
Long-term storage
Fermented giardiniera can be made as a quick fermented pickle. Or it can be stored in a cool location, to ferment for up to 6 months.
If you want to store your fermented vegetables for longer than a few weeks, there are a few extra precautions that you need to take.
- Be sure that your jars are clean and sanitized.
- Use a jar that will allow gas to escape while preventing contamination. I’m a big fan of fido jars. You could also use a mason jar with an airlock or pickle pipe.
- Don’t use a starter. Salt is the best way to control a long-term ferment. Here’s how to calculate a good brine ratio for long ferments. You will need about 1 tablespoon of salt per quart-sized jar.
- Store fermented giardiniera in a cool, dark location. A garage or basement is perfect. In my urban townhouse, I stash ferments in a cool-ish closet.
- Since the vegetables will be providing the culture, try to include some farm-fresh vegetables.
Fermented Giardiniera: Italian Pickled Vegetables
Giardiniera is a delicious way to preserve summer’s bounty. These Italian-style fermented vegetable pickles can be made hot or mild. Serve them as antipasti, with cheese and crackers or use it as a delicious sandwich filling.
- Prep Time: 15 minutes
- Total Time: 15 minutes
- Yield: 2 quart jars 1x
- Category: Pickles
- Method: Fermented
- Cuisine: Italian
- Diet: Vegan
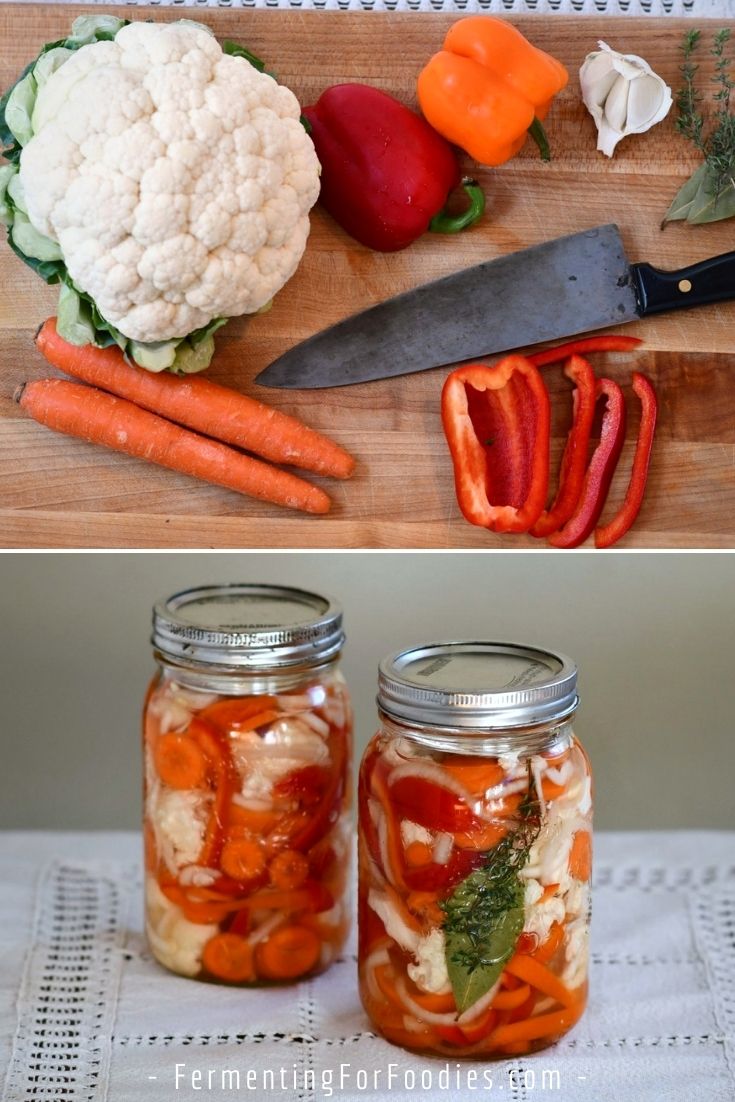
Ingredients
- 1 small cauliflower or half a cauliflower, diced into bite-sized sections (about 3 cups)
- 2 sweet peppers, thinly sliced
- 2 carrots, thinly sliced
- 2 celery stalks, diced
- 1 medium onion, thinly sliced
- 3 cloves of garlic, peeled and sliced in half
- 2 bay leaves
- 2 sprigs of fresh thyme
- 2–4 hot peppers, thinly diced (optional)
- 2 Tbsp salt (non-iodized)
- 3 cups water, enough to cover (chlorine-free)
Instructions
- Wash and prepare all the vegetables as instructed.
- Mix the vegetables and salt in a large bowl.
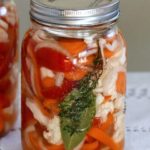
- Divide the vegetables between 2 quart-sized jars. Add in the herbs. Everything should be tightly packed in, and it’s easiest to do this by hand.
- Pour water into the jars, making sure all the vegetables are below the brine. Use a weight to keep the vegetables submerged.
- Leave the jar to ferment in a dark location (a kitchen cupboard is perfect) for 3-7 days. See the section above for advice on how to safely ferment giardiniera for up to 6 months.
Notes
- Feel free to use any combination of these vegetables. Or try adding in other firm vegetables like radishes or green beans. This is truly a garden mix, so use what is in your garden!
- Feel free to reduce the salt to 2 tsp per jar and use 1/4 cup of starter liquid per jar. I usually use cultured apple cider vinegar as my starter, but you could also use other fermented vegetable brine.
I found this recipe from Everyday Healthy, Everyday Delicious when I googled “Fermented Italian” to try to find some traditional Western ferments. I’ve been making it on repeat! It is now a staple in our house for sure. I just made a new batch tonight!
I am new to your site and glad to find it- I have been looking for more ferments in European/Western food traditions. I like Indian food etc but I am not Indian (so don’t want to eat that way everyday). I am eager to try the Pain de Campagne and other recipes!
Thank you for your comments!
I saw some similar recipes, but I didn’t know the name is giardiniera. I will try it with a mild taste, without the chili peppers.
Cool! Trying today, after fermentation do you preserve in oil?
I usually eat them right away, like a pickle. Preserving in oil is a different process. 🙂
Do they taste different than a vinegar jarred store product? Mine have a bit of a funky taste and the liquid is a little cloudy
If the store-bought giardiniera was pickled with vinegar, then it would have a pickled flavor. This giardiniera will have a more fermented flavor (think Polish dill pickles or sauerkraut). Cauliflower does tend to get a bit “stinky” when fermented (like plain steamed cauliflower). So perhaps the flavor? Cloudy isn’t a huge issue as it could be yeast. That’s even more likely if you used a starter culture. Just keep an eye out for mold, which will float on top of the brine. Enjoy!
This is so SO good!! Love that I found your recipe! I also tried to do a jar of fresh green beans with onions……I won’t do that again. I really loved having this on top of salad.
Glad you liked the giardiniera! Sorry to hear that your onions and green beans didn’t work out. Were the onions too strong? Or are the green beans too funky? I often add a wee bit of cider vinegar in with onions as I’ve found it helps with the flavor. Cheers, Emillie
Green beans seems to be super salty. Onions were ok. Plus the green beans didn’t seem to “soften”. So quite hard and salty was my take on it.
Ah, thanks for sharing!
How can I preserve these in oil? So excited to try!
I have preserved vegetables in oil after fermenting. To preserve in oil, drain the vegetables from the brine, then pack them into a jar with vegetable oil. Store in the fridge and use within 6 months. I recommend vegetable oil over olive oil because it won’t harden in the fridge. I also recommend saving the brine. It makes a delicious alternative to broth in soups and stews. Cheers, Emillie
This may be a dump question, but in reading other fermenting recipes (sauerkraut) there is a suggestion to cover the jar with a cloth with no mention of a jar lid. Does this recipe here call for that, or can I put the jar lid on?
I guess I forgot to specify in this recipe. 🙂 Feel free to cover it with a cloth or a loosely tightened lid to keep bugs out. You can also use a fido jar, pickle pipe, or similar. This will bubble as it ferments, so you need to make sure the gas can escape. Cheers!
I am new at fermenting and I would like to know how much kombucha would you use in this recipe? Or are you supposed to just use the kombucha without the water and what about the salt?
Hi Jan, I use unflavored kombucha in the place of ACV in all of my recipes. They are very similar ferments and culture the same way. The recipe doesn’t require a starter as the salt and vegetables are fine to ferment on their own. However, if you want a bit of extra tanginess and less salt, reduce the salt to 2 tsp and add 1/4 cup of kombucha. Cheers!
I started my giardiniera a week ago and I can already tell it’s going to be amazing! I couldn’t find nice hot peppers so I added red pepper flakes. I just tasted a little of the brine and it has just the right heat. Already planning on saving the brine to start sauerkraut!
Yum! That sounds great! I haven’t tried it with chili flakes. Thanks for sharing the idea. 🙂
Hi Emilie,
I made this and although the flavor was great, the veggies turned to mush. I used Bay leaves as recommended, as I understand they were supposed to help preserve the crispness.
wondering what may have went wrong.
thanks,
M
Peppers will always get soft when fermenting. However, cauliflower and carrots should stay firm for the first 3 days, then slowly soften the longer they ferment. While bay leaves and other tannins help, all fermented vegetables will be soft if they’ve fermented for longer than 7 to 10 days. Turning to mush might also be because you sliced them up very finely. I typically do slightly larger pieces which will hold their form a bit better. Cheers!